To configure connection settings, you must load a previously downloaded activation
file. This activation file is then used to connect your Security Center system to the Genetec ClearID™ web application.
To install or configure the plugin in Security Center, you must be a Site administrator. For
example, local security, system integrator, or Security Center administrator.
An activation file is used to authenticate the communication
between your Security Center system and the
ClearID web application.
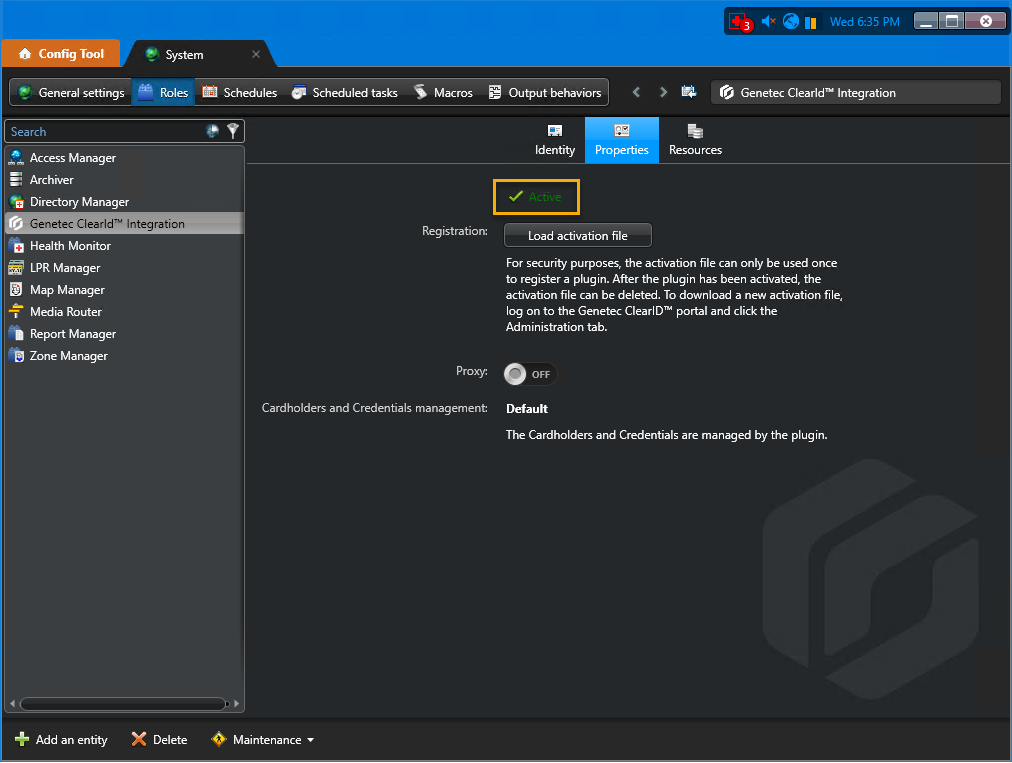
For security purposes, the activation file can only be used once to register a
plugin. After the plugin is activated, the activation file can be deleted.
Procedure
From the Config Tool homepage,
open the Plugins task.
Select ClearID Integration from the
entity browser, and click the Properties tab.
Click Load activation file and select the activation
file that you previously downloaded.
(Optional) Configure the proxy server settings:
ON
Specifies that a proxy server is required to access the Internet. This option is
typically used by customers behind a firewall or where network access to the Internet is
restricted.
OFF
Specifies that a proxy server is not required. This is the default.
Proxy URL
If Proxy is enabled, enter the proxy URL supplied by your organization. For example,
https://proxy:8080/outgoing. This information is typically
supplied by the network administration team.
(Optional) Configure the proxy authentication settings:
ON
Specifies that proxy authentication is required.
OFF
Specifies that proxy authentication is not required.
Proxy username
If proxy authentication ON was enabled, enter the proxy
username supplied by your organization.
If proxy authentication ON is specified, set a proxy
authentication password:
Click Set password.
Enter a New Password and then confirm the
password.
Click Apply to save your password.
Click Apply to save all changes.
The ClearID plugin is now connected to
Security Center.