
Inviting visitors manually
2026-01-26Last updated
If you have fewer than five visitors to invite to your event, you can add your visitors manually.
Before you begin
What you should know
- If your identity home site is configured, you’re automatically granted access to invite visitors to that site. Access is only automatically granted if the options for site visitor management have been configured to allow people to invite visitors.
- The options displayed when inviting visitors can vary depending on the site settings and settings configured for visitor management.
Note:
Mandatory fields are highlighted in the user
interface with an asterisk (*).
Procedure
-
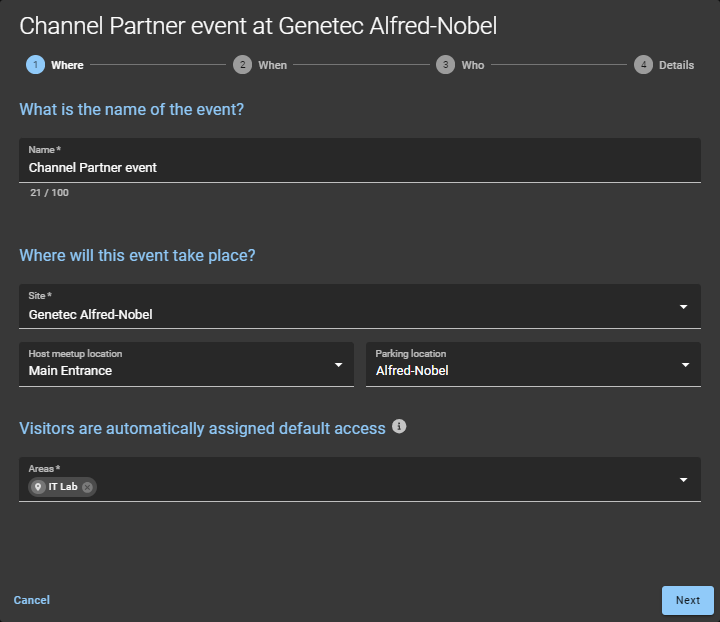
In the New visit event wizard, enter or select details about
where the event will take place.
-
Enter or select details about when the event takes place and the purpose of the
event.
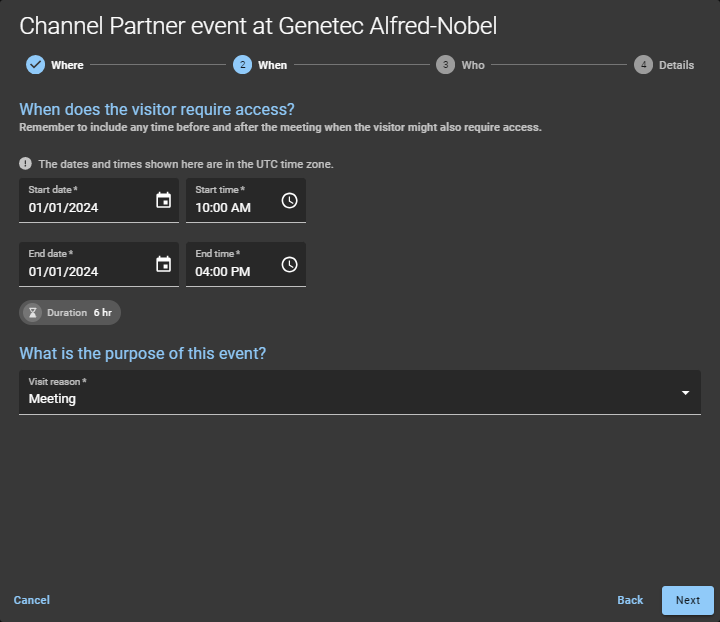 Tip:Remember to include time before and after the visitor event or meeting when the visitor might also require access.
 -
Enter or select details about who to invite to the event.
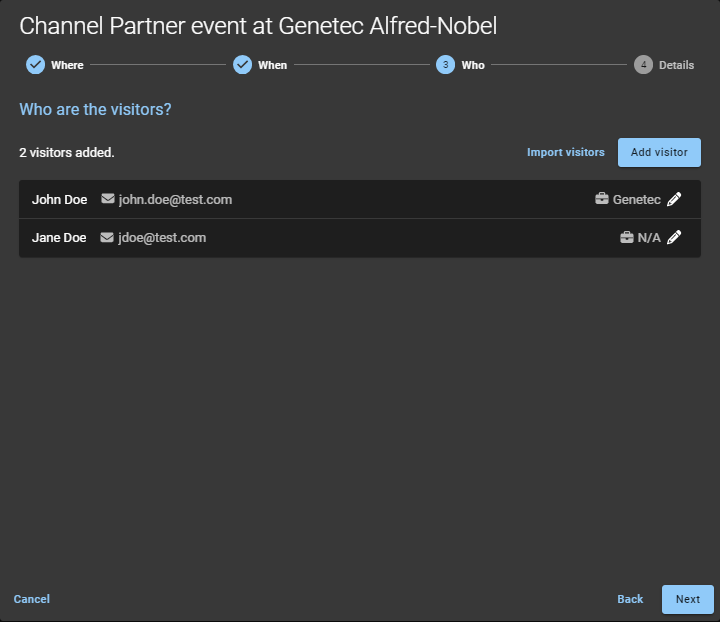
- Click Add visitor and complete the fields.
- Click Save.
- Repeat for each additional visitor.
-
Complete details about the event.
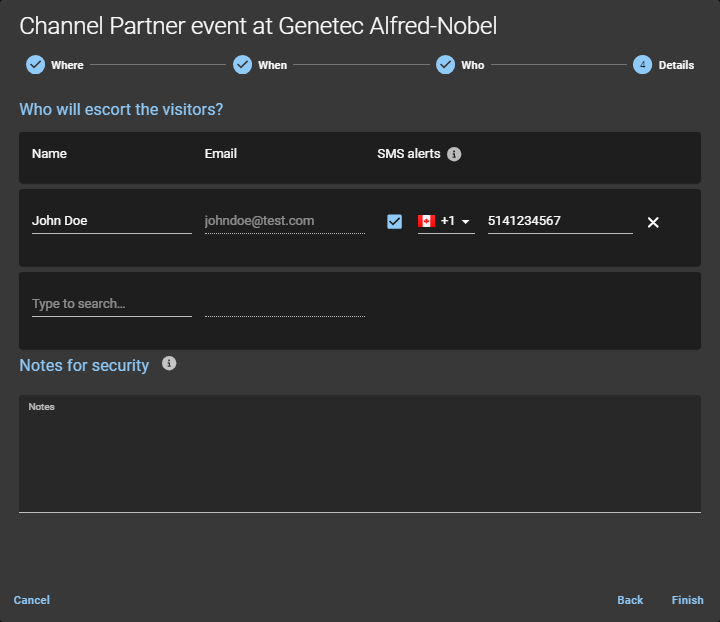
- Name
- The name of the visitor event host.
- The email address for the visitor event host.
- SMS
- Enter a mobile phone number to send SMS alert notifications to visitor hosts
when the visitor checks in.Note:Use the search field to add more visitor hosts. You can add up to 10 visitor hosts.
- (Optional) Notes for security
- Add notes about the visitor, the visit invite, or the visit event.
Example
Watch this video to learn more. Click the Captions icon (CC) to turn on video captions in one of the available languages.
After you finish
- Check your email for a Visit approved email.
- Check My requests in Genetec ClearID™.