Only account administrators or site
owners can enable or configure visitor management for sites in
Genetec ClearID™.
The options displayed when a visit request is created vary
depending on the users requesting access and also the settings that you
configure here.
Only account administrators can grant user permissions to invite visitors using
roles.
Users are automatically granted Invite visitors permissions for their
home site by default.
Procedure
Click Organization
> Sites.
Search for and select a site.
Click Visitor management to configure the visitor
management options for a site.
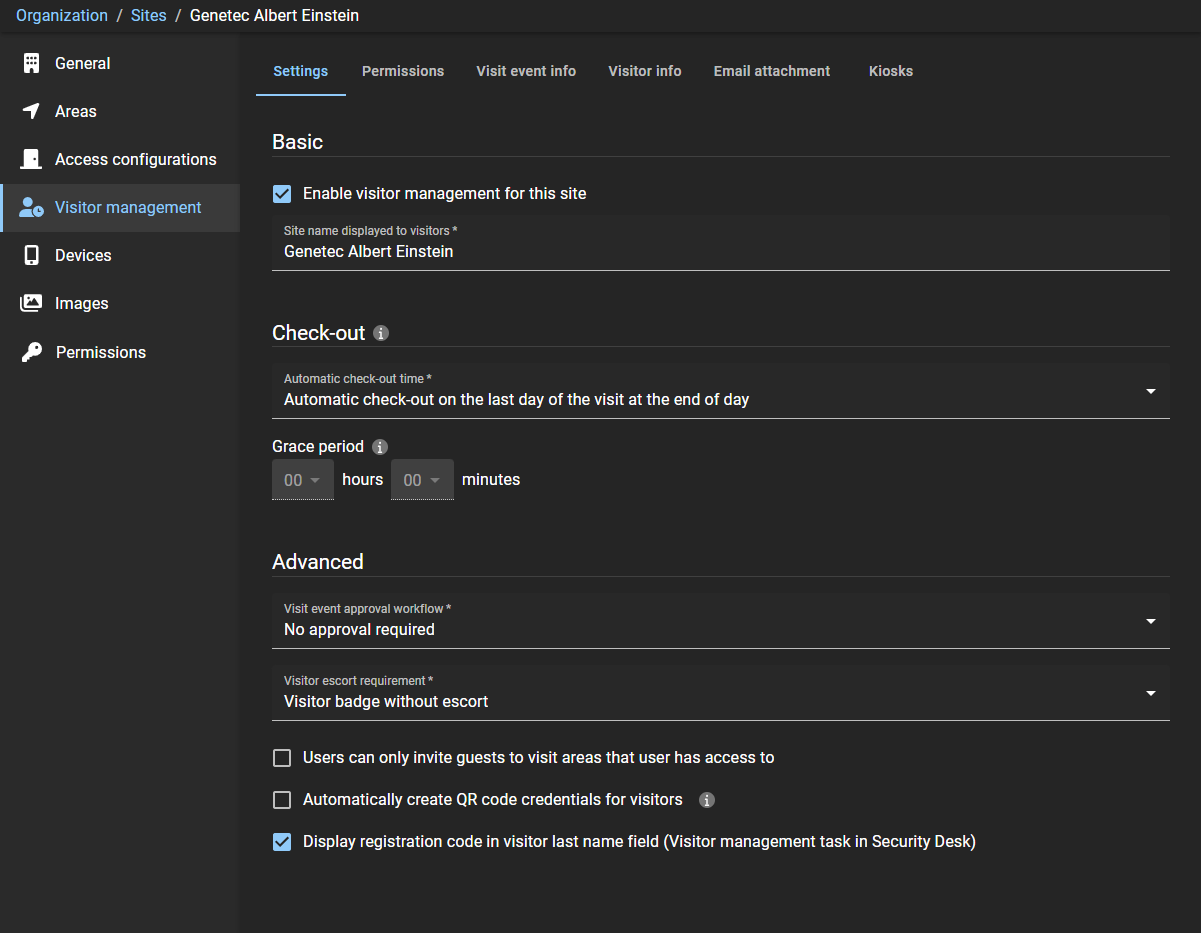
Click the Settings tab.
In the Basic section, configure the options you
require:
Enable visitor management for this site
Select this checkbox to enable visitor management for this
site.
Site name displayed to visitors
Enter the site name that you want displayed externally to visitors.
In the Check-out section, configure the options
you require:
Automatic check-out time
Automatic check-out on the last day of the visit
at the end of the day
The visitor is checked out automatically on the
last day of the visit at midnight.
Automatic check-out at the scheduled visit end
time
The visitor is checked out at the specified visit end
time.
Visitor's temporary access rights and QR code
credential are deactivated during automatic check-out. If
a grace period is activated, visitors are checked out
after the additional grace period lapses after the visit
end time.
Grace period
Adds extra time to the scheduled end time of the visit
event. After the grace period lapses, the visitor is checked
out.
(Optional) In the Advanced section, configure the
options you require:
Visit event approval workflow
Select the approval workflow that you require:
No approval required
No approval is required to complete visit event
approval. For example, to simplify employees
inviting visitors at any time.
Supervisor approval required
Supervisor approval is required to complete visit
event approval.
Visit event approver approval required
Visit event approver approval is required to
complete visit event approval.
Note:
If an area is
selected during the visit event creation, it can
trigger its own approval workflow.
Visit escort requirement
Select the badge type that you require:
Visitor badge without escort
Typically used for visitors who don’t require an escort and
who don’t need door access to secure or sensitive
areas.
Visitor badge with escort
Typically used for visitors who do require an escort or who
need door access to secure or sensitive
areas.
Note:
The
visitor escort rule must also be
turned on for the areas in Synergis™ to enforce the
visitor escort rule. For the escort function to work
properly, the Cardholder groups can escort
visitors option must also be enabled in the
General settings of the
Access control task in Genetec™
Configuration desktop.
Users can only invite guests to visit areas that they have access to
If the checkbox is selected, users can only invite
guests to visit areas that the requesting user has
access to. This setting is enforced when a guest
visit request is created.
If the checkbox is cleared, users can invite guests
to visit any area in ClearID that allows
visitors.
Automatically create QR code credentials for visitors
If the checkbox is selected, ClearID automatically creates a QR code
credential for visitors when a visit request is created. Visitors can
then use the QR code contained in the visitor confirmation email to
access specific parking entrances, turnstiles, or gated facilities.
The QR code can also be used during check-in with security, at a
reception, or at a Genetec ClearID™ Self-Service Kiosk.
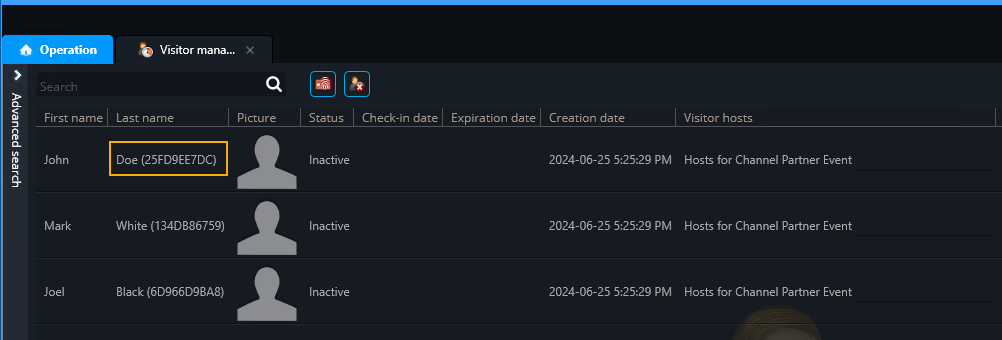
Display registration code in visitor last name field (Visitor
management task in Genetec™ Operation desktop)
If the checkbox is selected, the last name field displays the
last name of the visitor and the QR code value. This checkbox is
selected by default.
The checkbox must be selected for a QR
code scanner to successfully scan and locate a pre-registered
visitor in Genetec Operation desktop.
Tip:
You can use a Zebra QR
code scanner to enter the QR code in the Last
name field for you. In the Visitor
management task in Genetec Operation desktop,
click in the Search field, scan the QR
code and press Enter.
If the checkbox is cleared, the last name field displays only
the last name of the visitor.
Note:
When the registration code option is changed, only
visitors created after the change are modified,
previously created visitors remain unchanged.
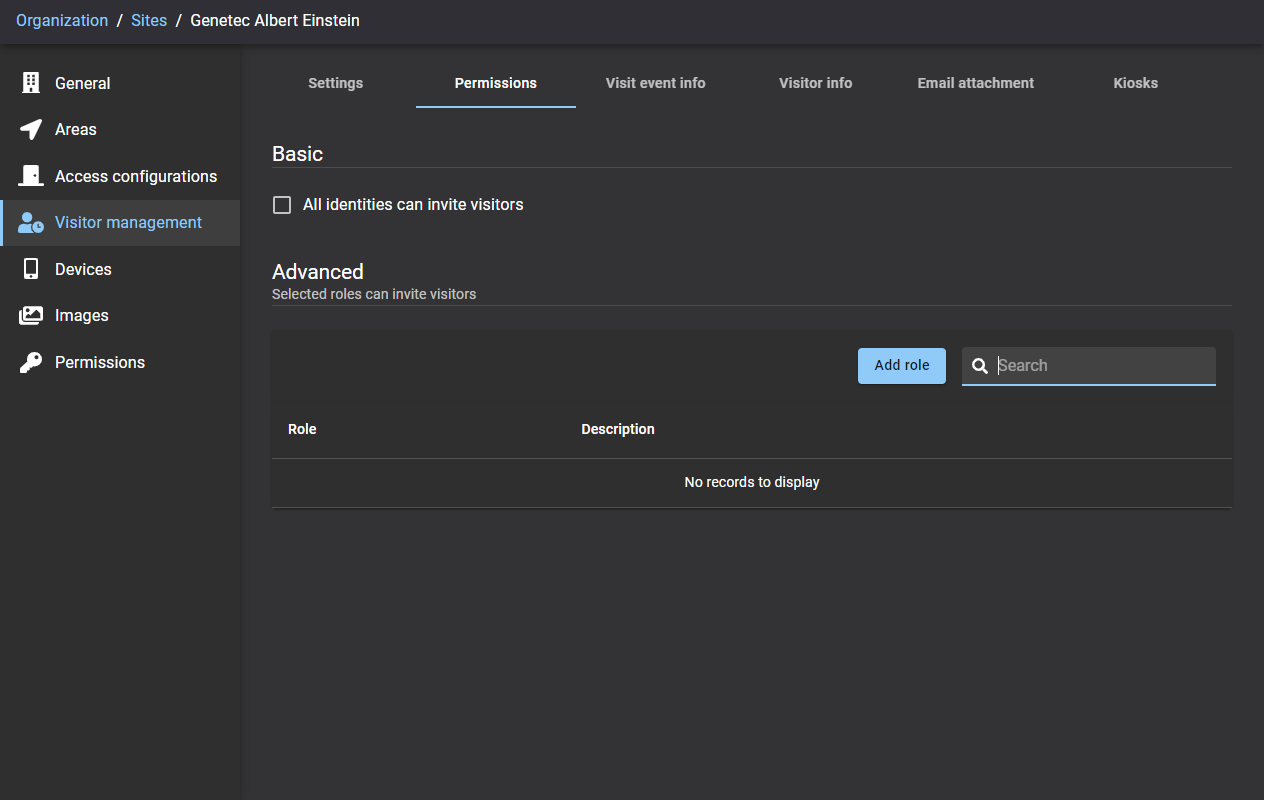
(Optional) Click the Permissions tab.
Do one of the following:
In the Basic section, select the All
identities can invite visitors checkbox if you want all
identities to be able to invite visitors to this site.
In the Advanced section, click Add
role if you want to use roles to manage who can invite
visitors to this site. You can then search for or select the roles that you
require and click Add.
Tip:
When adding new role permissions, advise role members to sign out
and sign in, if they want to load the new visitor invite permissions
immediately.
(Optional) Click the Visit event info tab and configure
the options you require:
In the Parking locations section, add parking
locations.
In the Host meetup locations section, add meetup
locations.
In the Reasons for visit section, add the typical
reasons for visits to your site.
For example, customer meeting, partner meeting, job interview,
delivery, taxi pickup, Uber pickup, lift pickup, and so on.
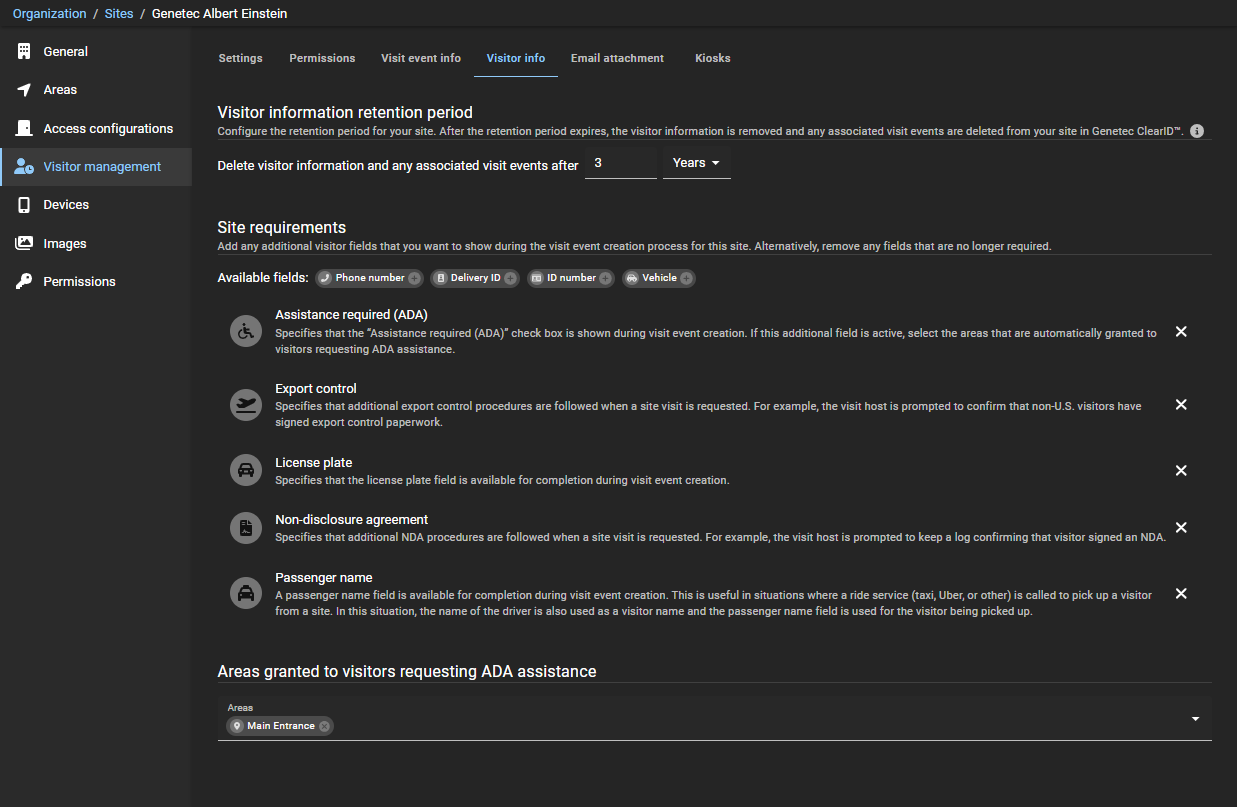
(Optional) Click the Visitor info tab and configure the
options you require:
In the Visitor information retention period
section, select a retention period in days, months, or years.
The default retention period is 1 year and the maximum is 3 years.
Note:
You
can configure the retention period for each individual site to comply with
the different data laws that might apply in your region.
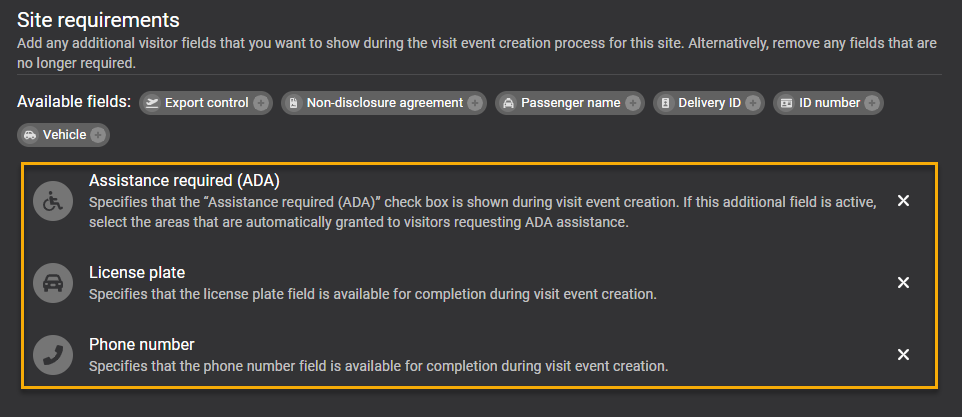
In the Site requirements Available
fields section, click to add each additional field that you want to include during
the visit event creation process for your site.
License plate
If selected, a license plate field is provided when a site
visit is requested.
Phone number
If selected, a phone number field is provided when a site
visit is requested.
Assistance required (ADA)
If selected, an Areas granted to visitors
requesting ADA assistance section is
displayed.
Note:
This assistance option is used to comply
with the Americans with Disabilities Act
(ADA).
Export control required
If selected, extra export control procedures are followed when a site
visit is requested. For example, the visit host is prompted to confirm
that non-U.S. visitors have signed export control
paperwork.
Non-disclosure agreement
If selected, extra NDA procedures are followed when a site visit is
requested. For example, the visit host is prompted to keep a log
confirming that the visitor signed an NDA.
Passenger name
If selected, a passenger name field is provided when a site
visit is requested. This passenger name field is useful in
situations where a ride service (taxi, Uber, or other) is
called to pick up a visitor from a site. In this situation,
the name of the driver is also used as a visitor name and
the passenger name field is used for the visitor being
picked up.
Delivery ID
If selected, a delivery ID field is provided when a site
visit is requested.
ID number
If selected, an ID number field is provided when a site
visit is requested.
Vehicle
If selected, an extra expected vehicle details field is
provided when a site visit is requested.
Note:
As fields are added, they are displayed in the Available
fields later in the section.
(Optional) If you added Assistance required
(ADA) to your site requirements, in the Areas
granted to visitors requesting ADA assistance section,
add areas that should automatically be granted to visitors requesting
ADA
assistance.
Note:
When an employee invites a visitor that requires accessibility
assistance to the site, the visitor is automatically added to the
list of ADA areas.
For example, If there’s a special door for wheelchair access, the people
responsible for the site or facilities add that door for wheelchair access
in a specific area and then add the area to the list of areas granted to
visitors that request ADA assistance. If a visitor checks in with ADA
enabled, ClearID grants the visitor access to this door, but not other
visitors.
(Optional) Click to remove any visitor fields that are no longer required.
Click the Email attachment tab and select the options
you require:
Instruction PDF
This instruction file is used if you want to automatically include a Visit
Instructions File PDF in email communications with visitors. For example, location
details, site map, travel instructions, and so on. Regardless of the uploaded file name,
the downloadable instruction file is saved as
VisitInstructionsFile.pdf.
No PDF uploaded
A PDF instruction file hasn’t been uploaded yet.
VisitInstructionsFile.pdf
Click to download a copy of the
VisitInstructionsFile.pdf.
Note:
This button is only visible
and active after an Instruction PDF has been uploaded.
Upload
Click to upload a PDF instruction file.
Best Practice:
If
your instruction file is a word document, click Save
as Adobe PDF before uploading to ensure that
visitors can’t modify the procedure.
Remove
Click to remove a Visit Instructions File PDF from email communications with
visitors.
Click the Kiosks tab to customize your kiosk
configuration.
(Optional) Customize the Kiosk options.
These options customize the choices that are displayed to your visitors on your
ClearID Self-Service Kiosk during the check-in or check-out process.
Note:
The
self-registration option is only displayed when all other check-in options aren’t
applicable.
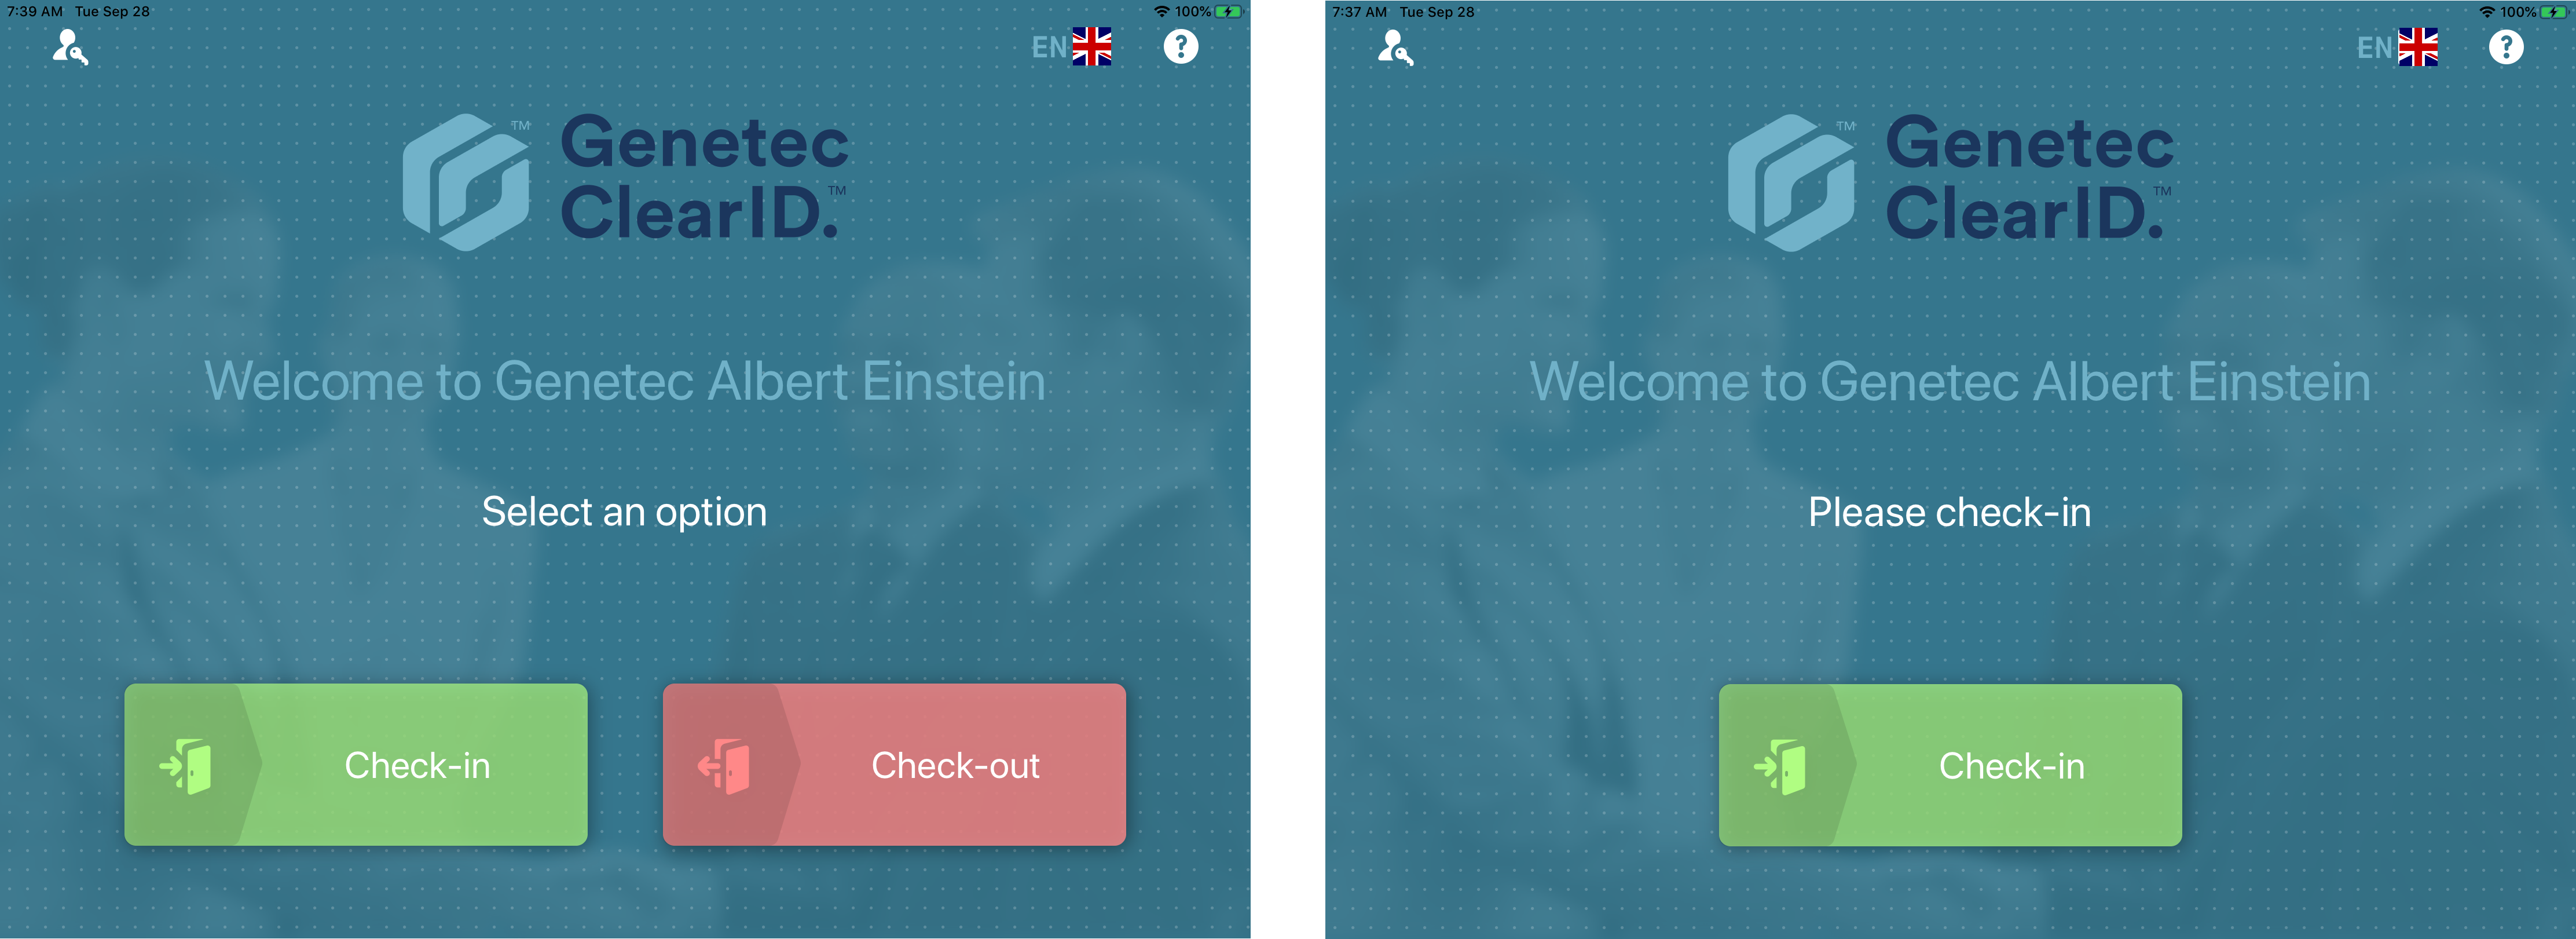
The following example shows the initial check-in or check-out screen
customized for two different scenarios.
The following example shows the Kiosk options
customized with QR code, ID,
and Email check-in options enabled.
The following example shows the Kiosk
options customized with QR code and
ID check-in options enabled.
The following example shows the Kiosk
options customized with only the
Email check-in option enabled.
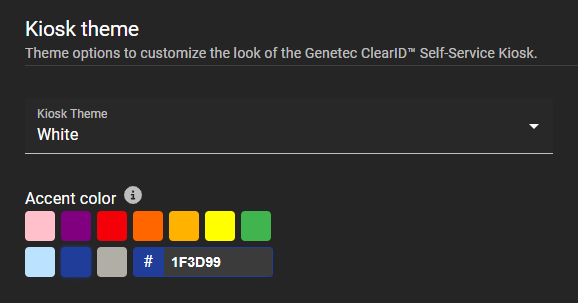
(Optional) Customize the Kiosk theme.
In the Kiosk theme section, choose a theme from
the following:
ClearID
The ClearID theme (HEX color code 35768D) has no accent
color.
White
The white theme includes extra controls to pick an accent
color. For example, to align with your corporate
branding.
If you chose the White kiosk theme, select an
accent color.
The accent color is applied to the buttons displayed on the
ClearID Self-Service Kiosk.
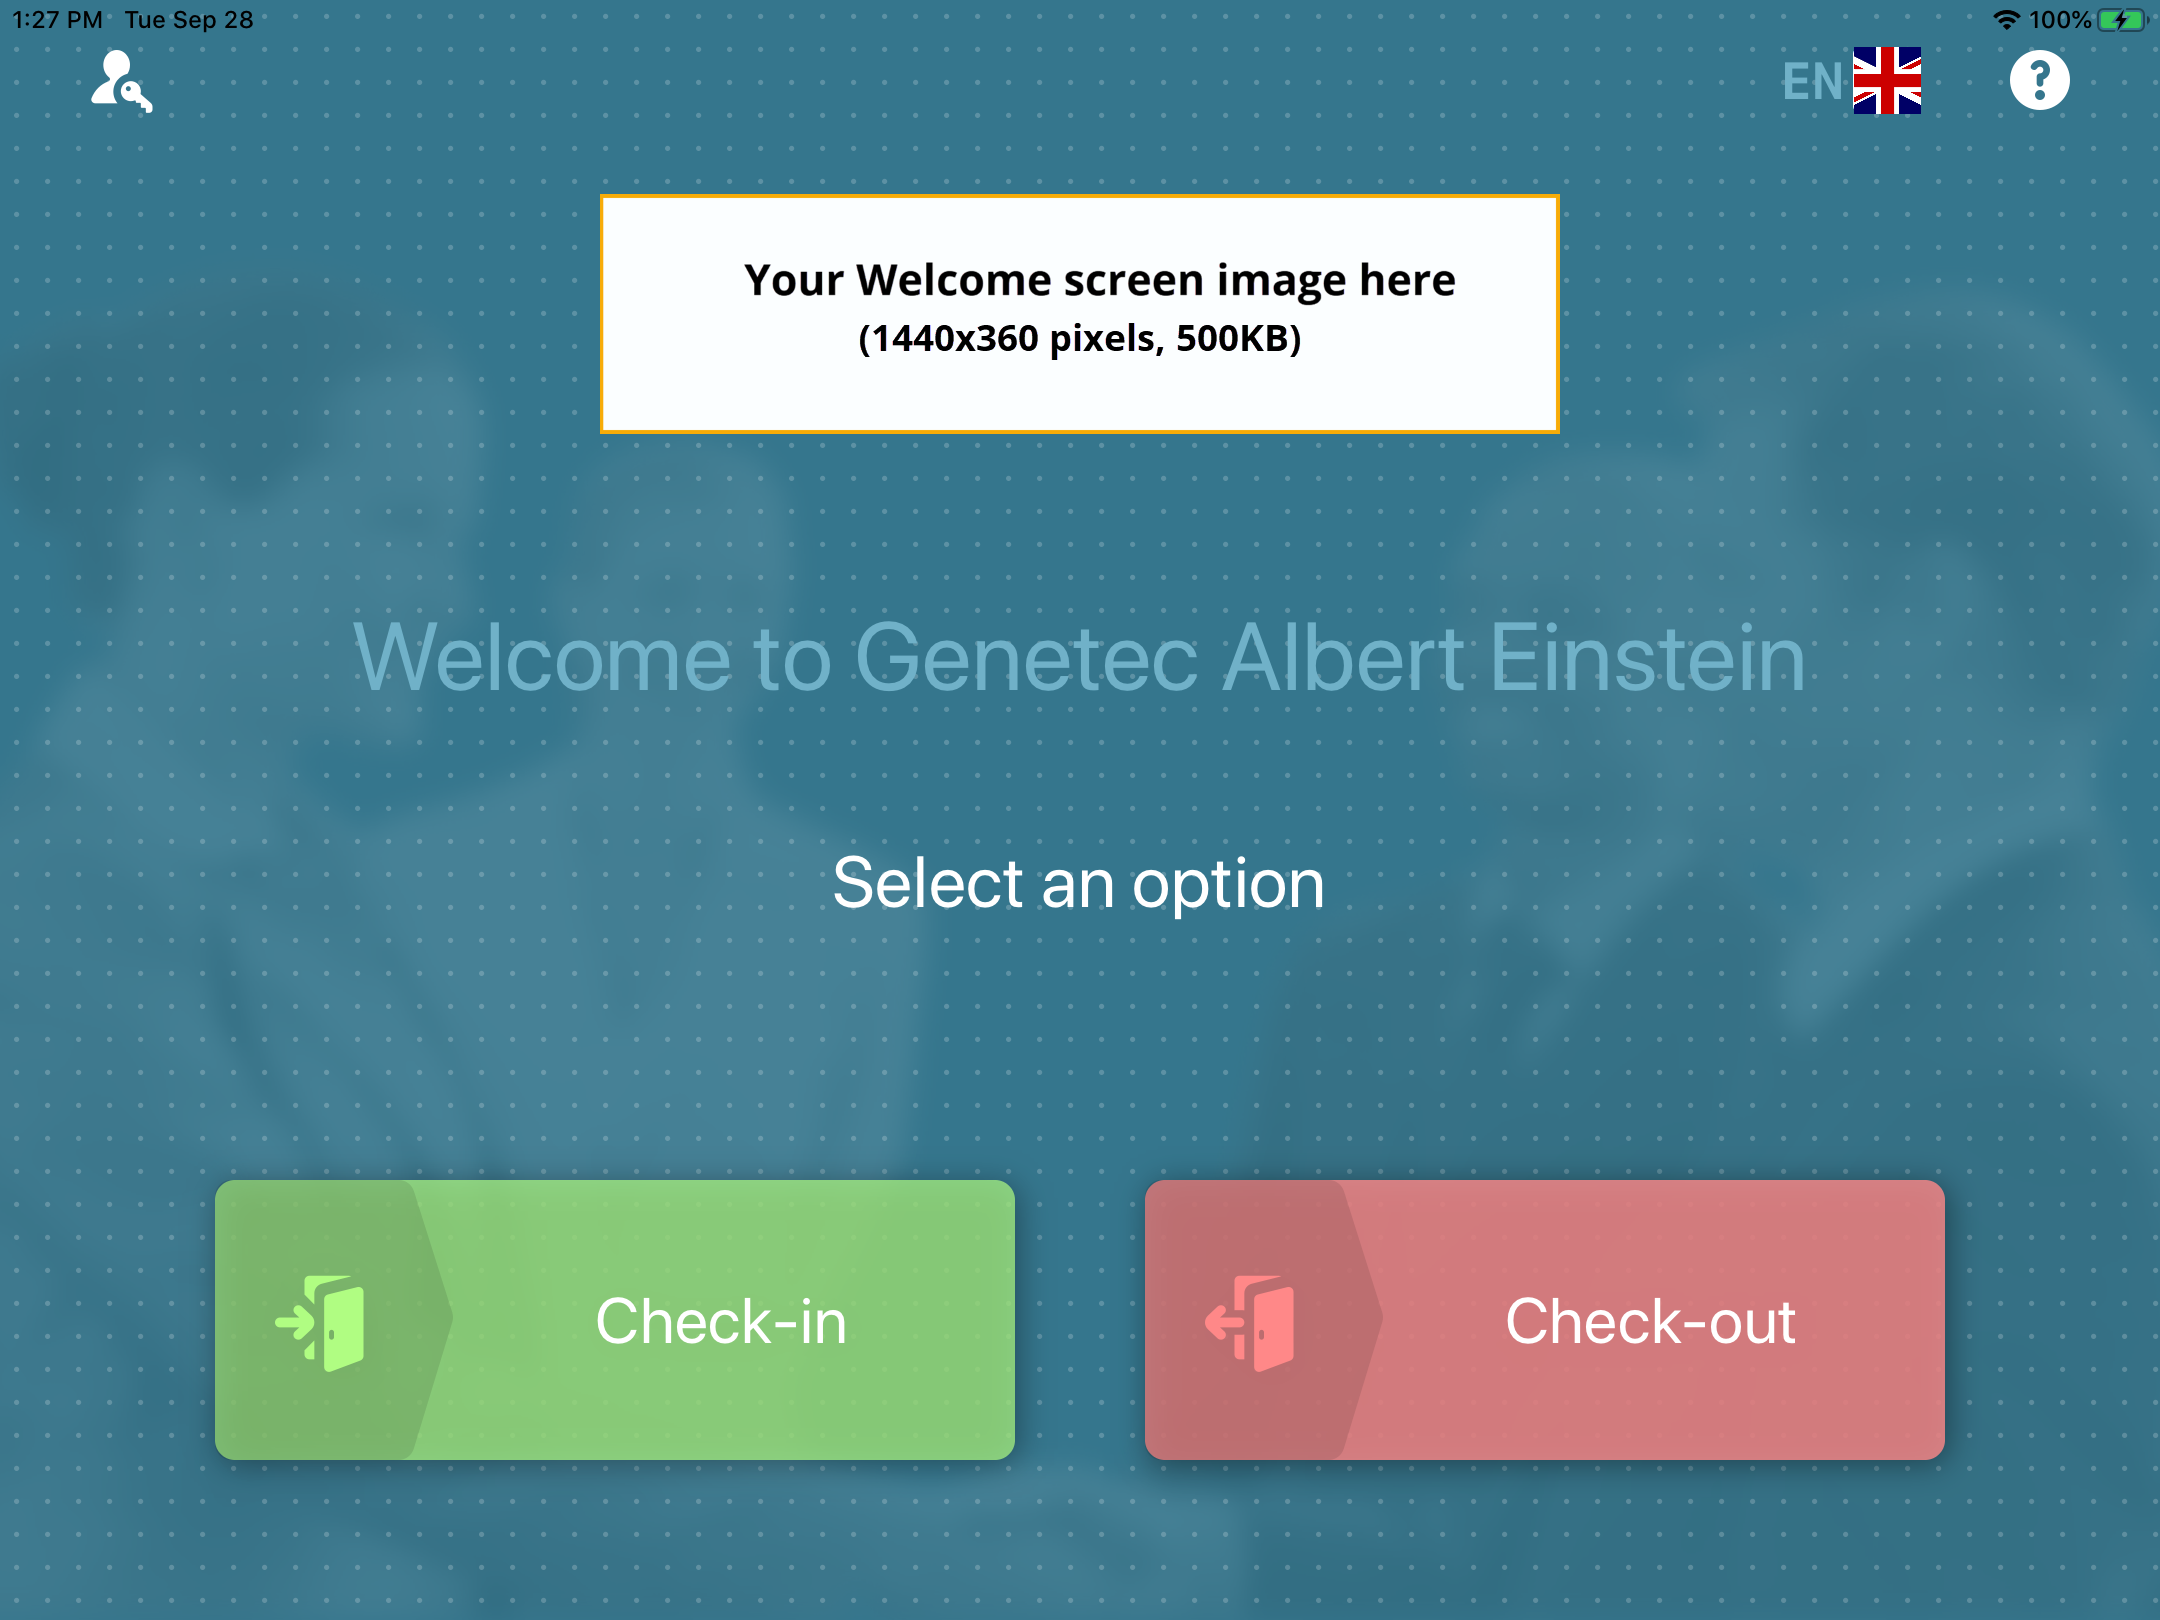
The following example shows the white theme with blue accent
color to match the blue corporate branding seen in the example.
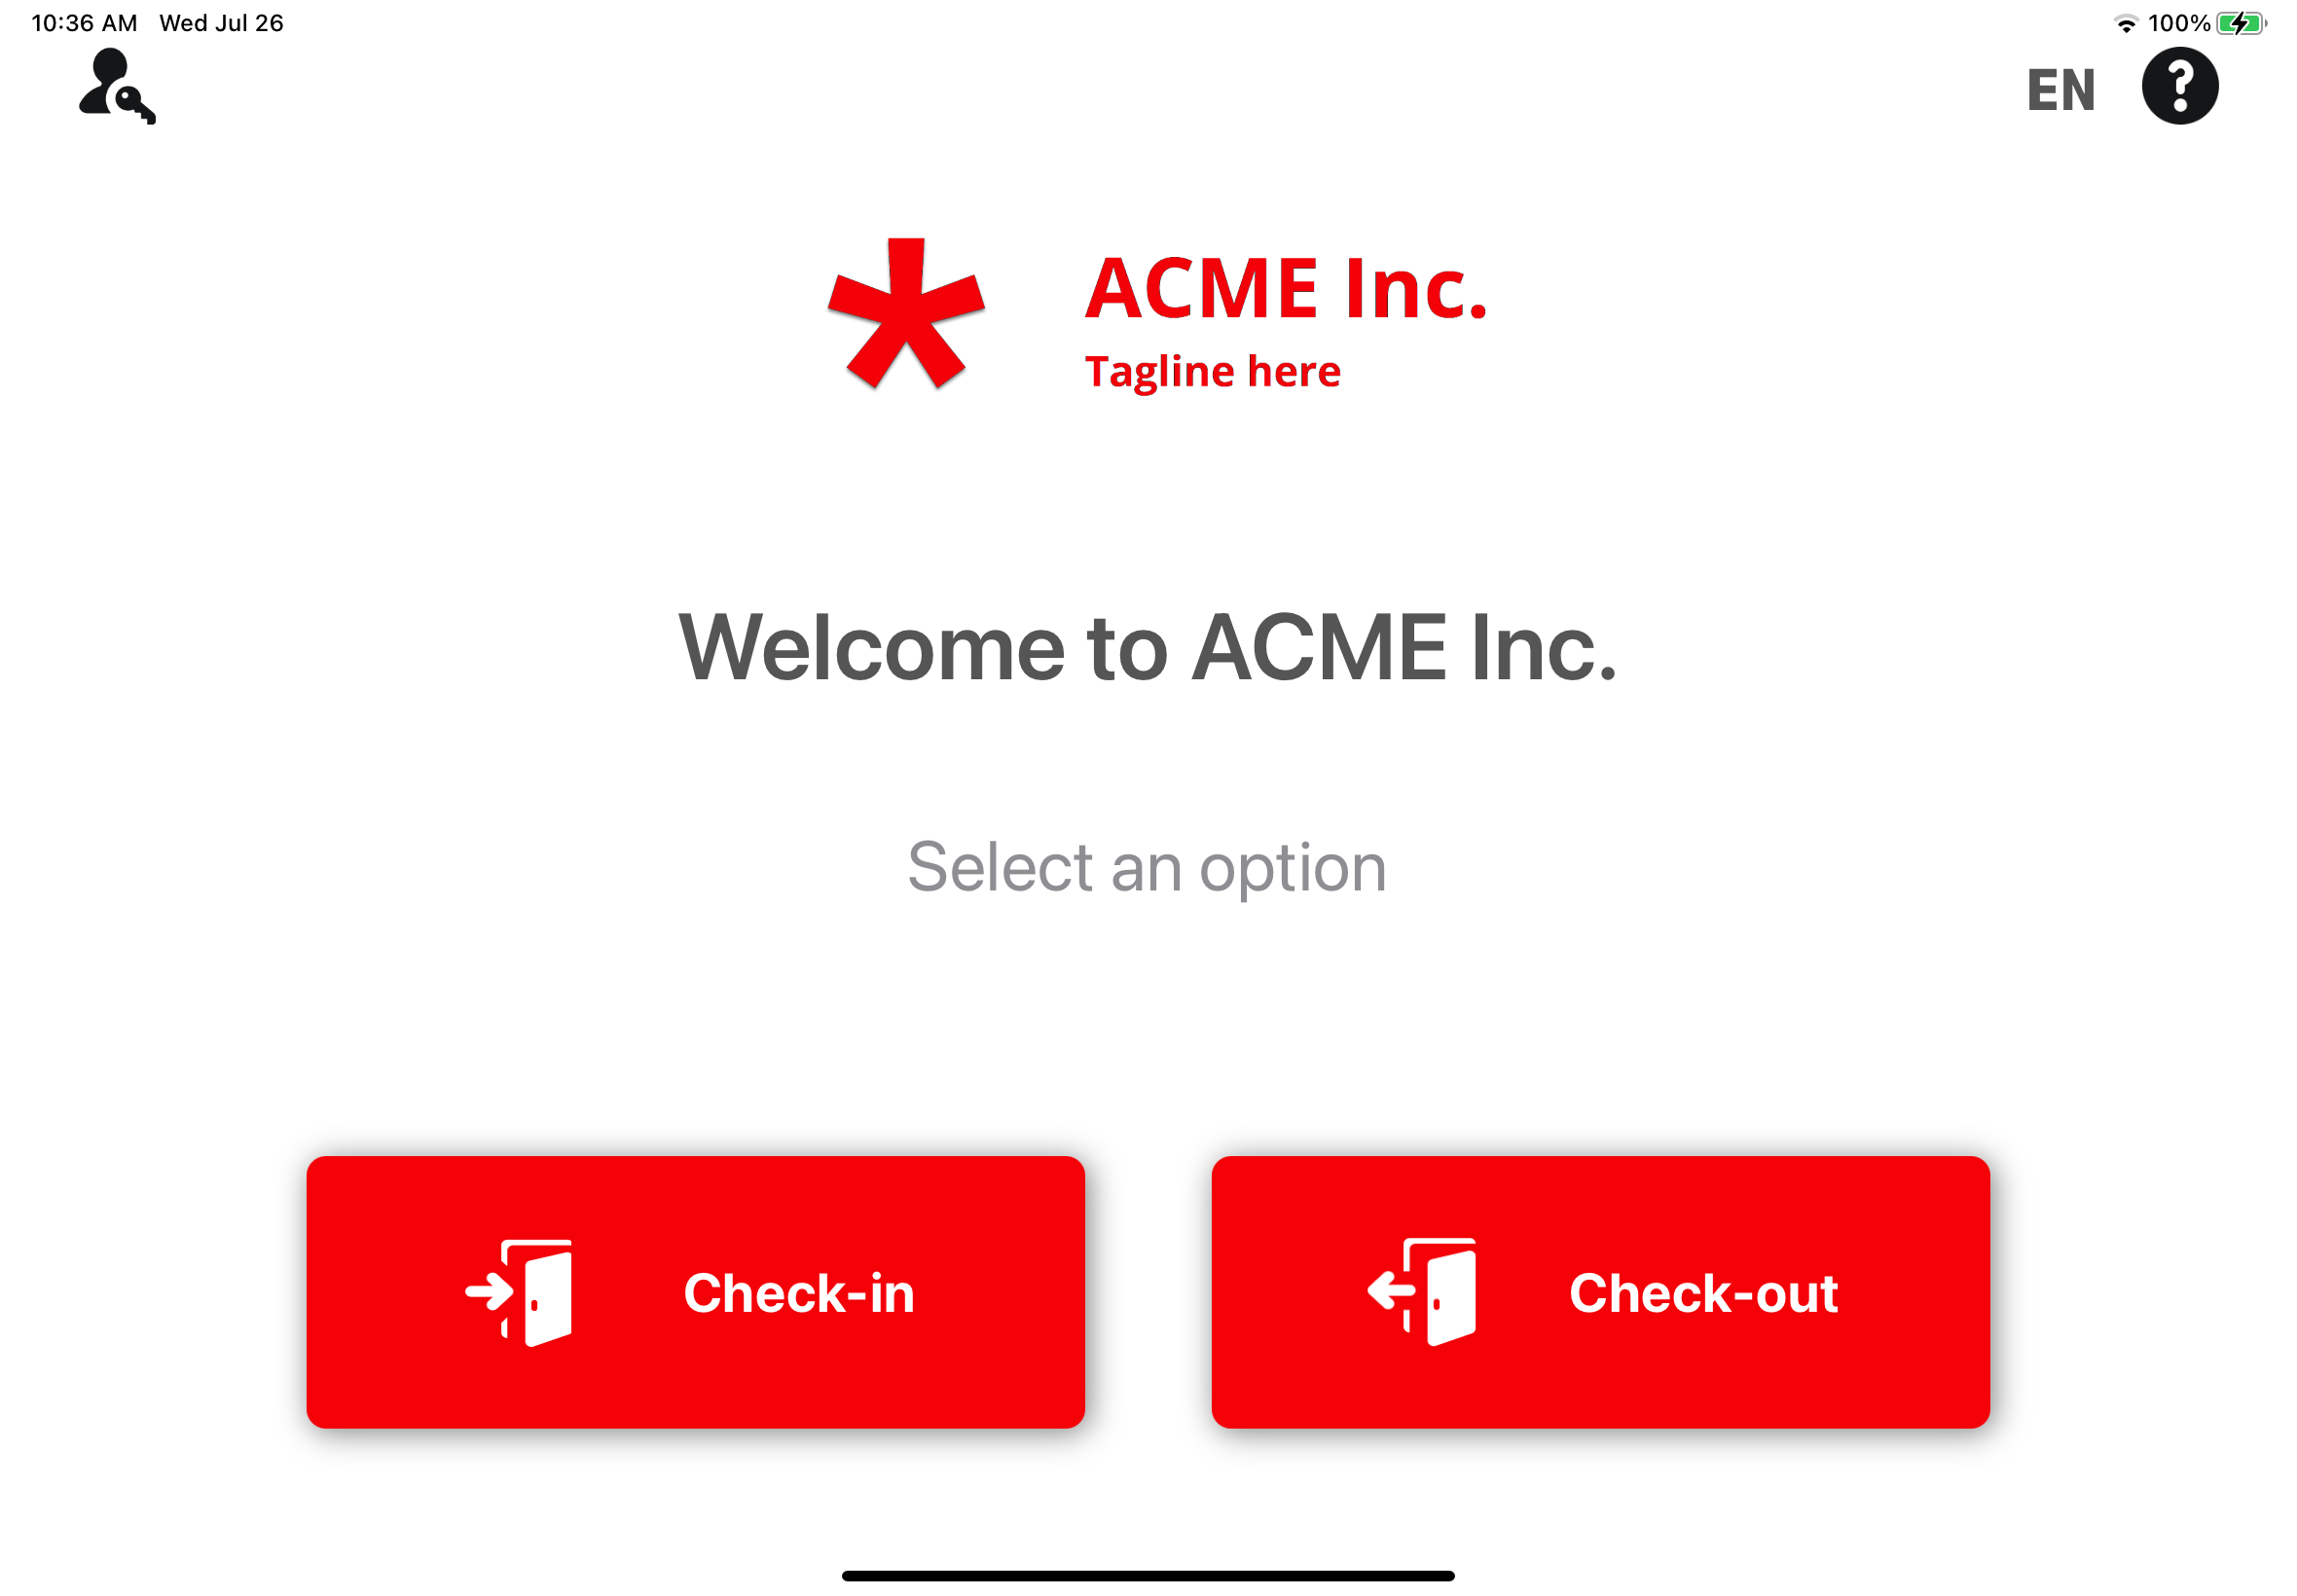
The following example shows the white theme with red accent
color to match the red corporate branding seen in the example.
(Optional) Customize the Kiosk welcome screen.
In the Kiosk welcome screen section, drag and drop
your picture or browse to select a Kiosk welcome
screen image.
This image is used as the welcome screen company name or
logo for the kiosk.
The following example shows the welcome screen with a custom
logo image.
Click Save.
Note:
Kiosk options changes are synchronized with your kiosk every 60
seconds.
Visitor management is enabled for the site.
After you finish
Submit an access request or visit request for this site.

 Tip:You can use a Zebra QR code scanner to enter the QR code in the Last name field for you. In the Visitor management task in Genetec Operation desktop, click in the Search field, scan the QR code and press Enter.
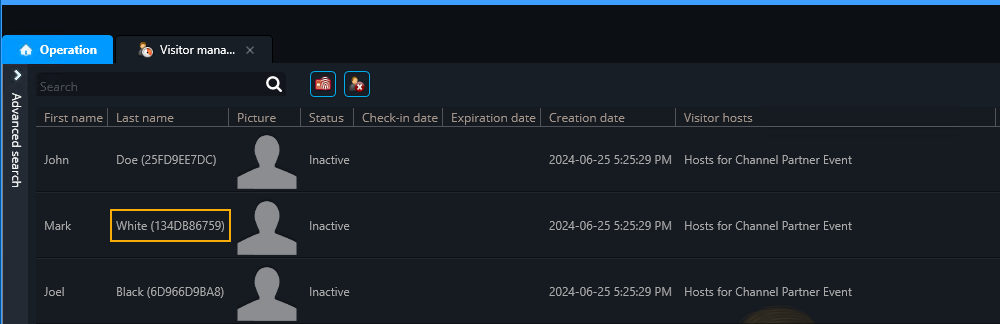
 Do one of the following:
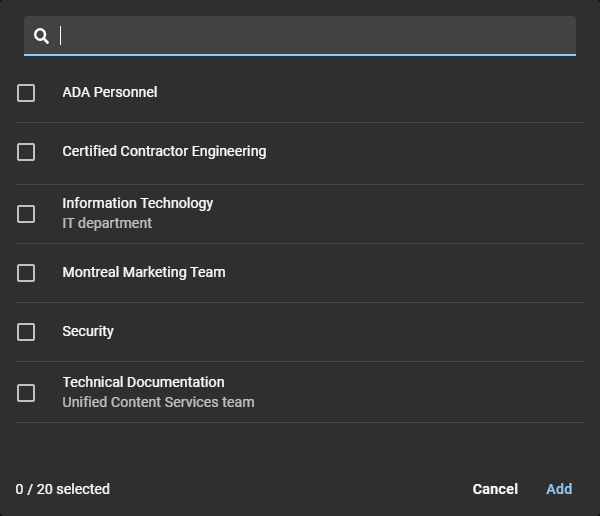 Tip:When adding new role permissions, advise role members to sign out and sign in, if they want to load the new visitor invite permissions immediately.
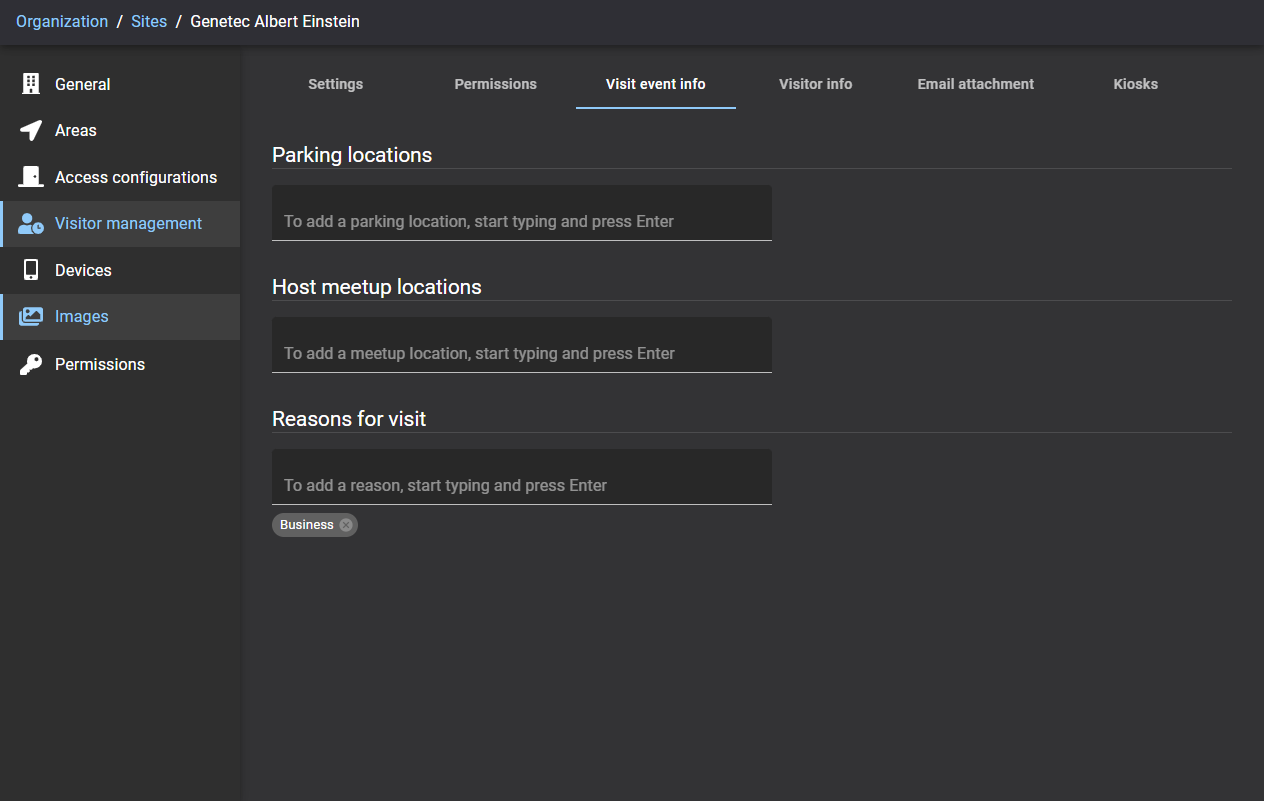
 to add each additional field that you want to include during
the visit event creation process for your site.
to add each additional field that you want to include during
the visit event creation process for your site.

 to remove any visitor fields that are no longer required.


 The following example shows the Kiosk options customized with QR code, ID, and Email check-in options enabled.
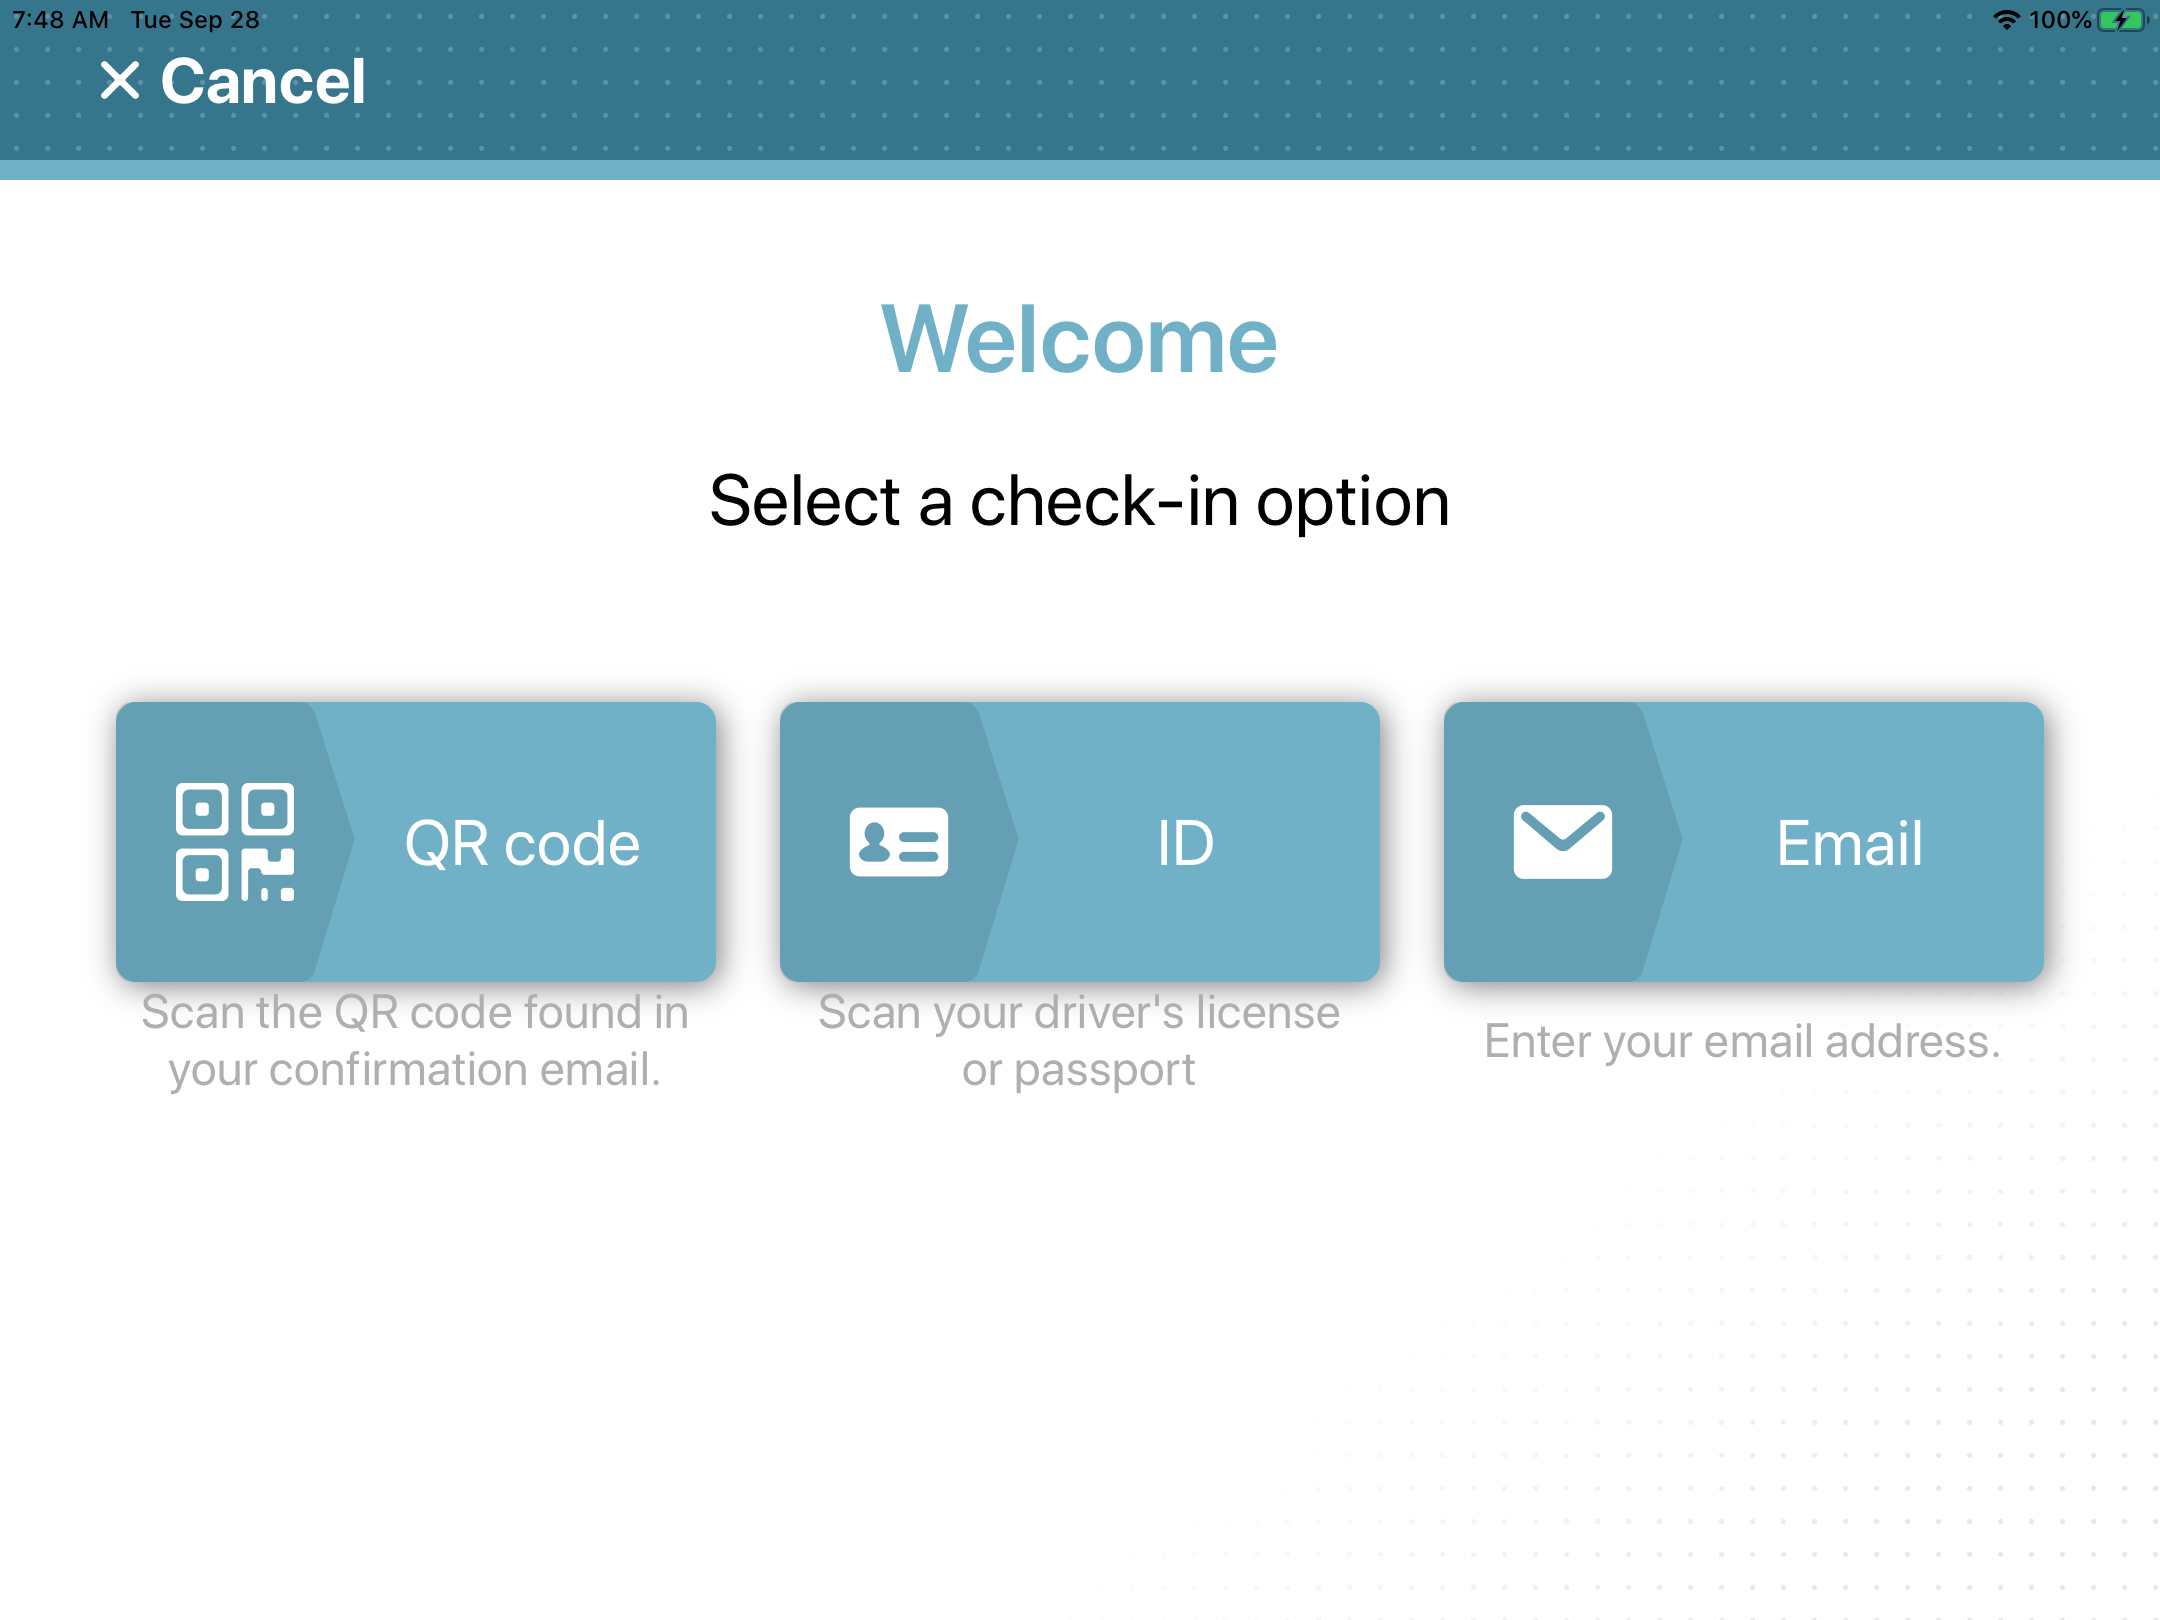 The following example shows the Kiosk options customized with QR code and ID check-in options enabled.
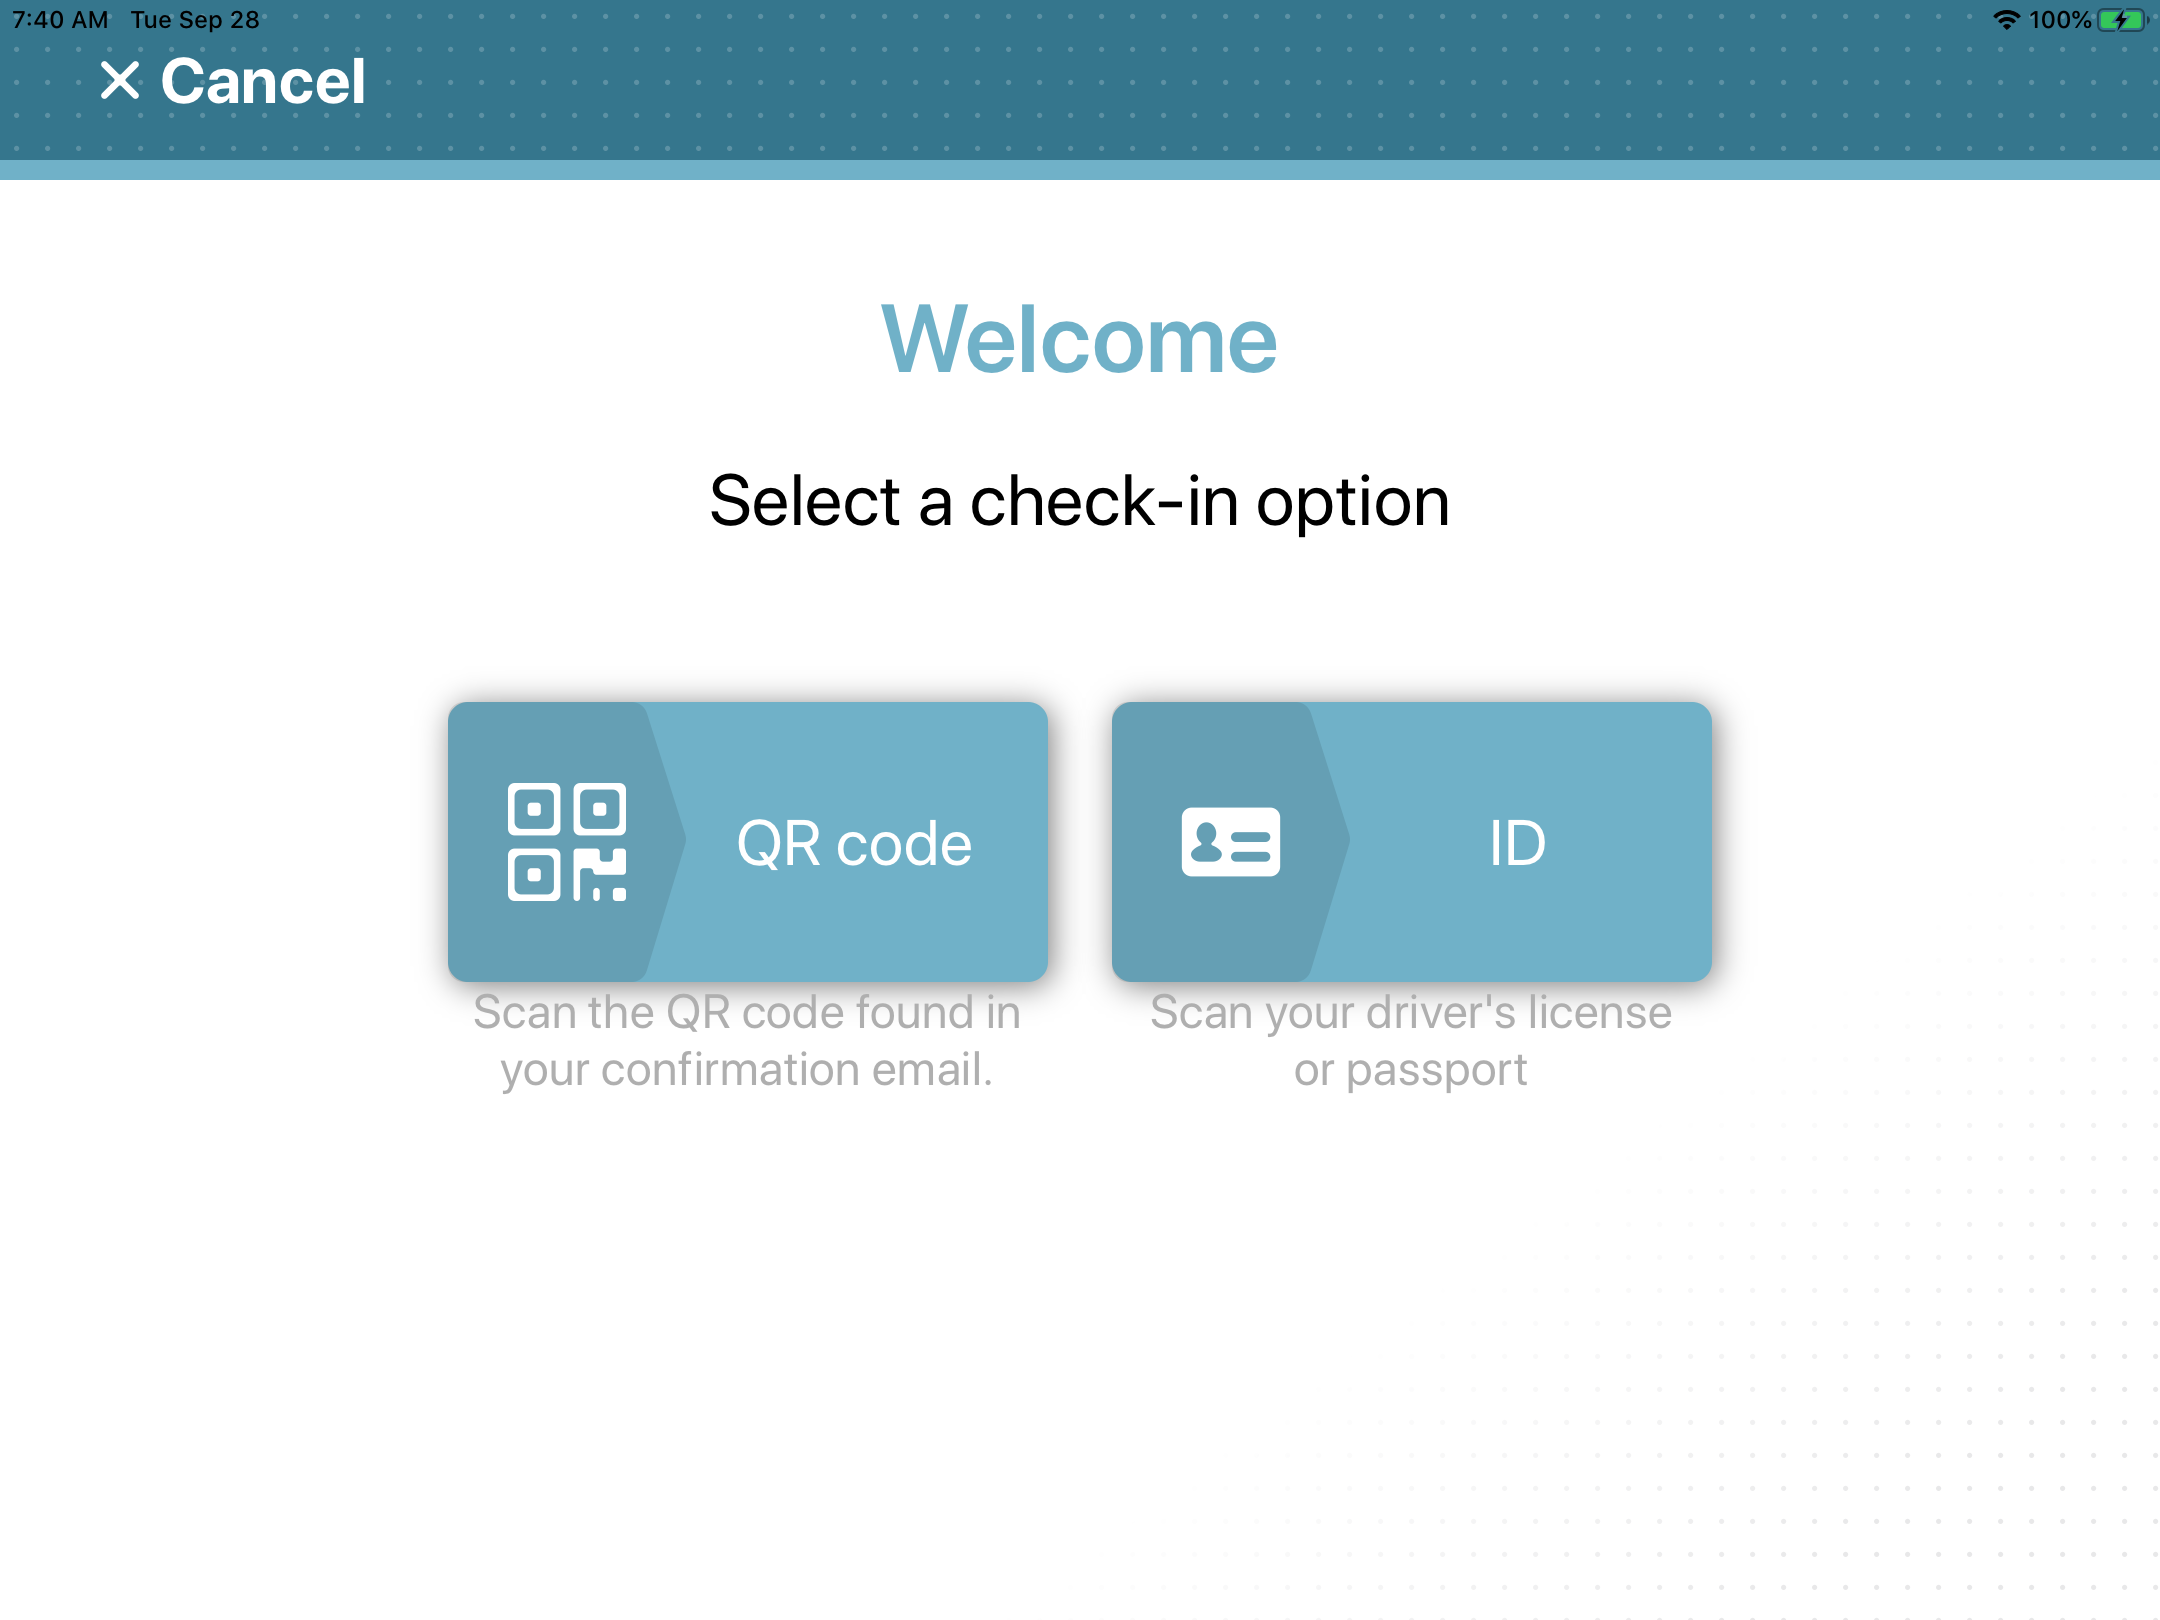 The following example shows the Kiosk options customized with only the Email check-in option enabled.
 The following example shows the white theme with blue accent color to match the blue corporate branding seen in the example.
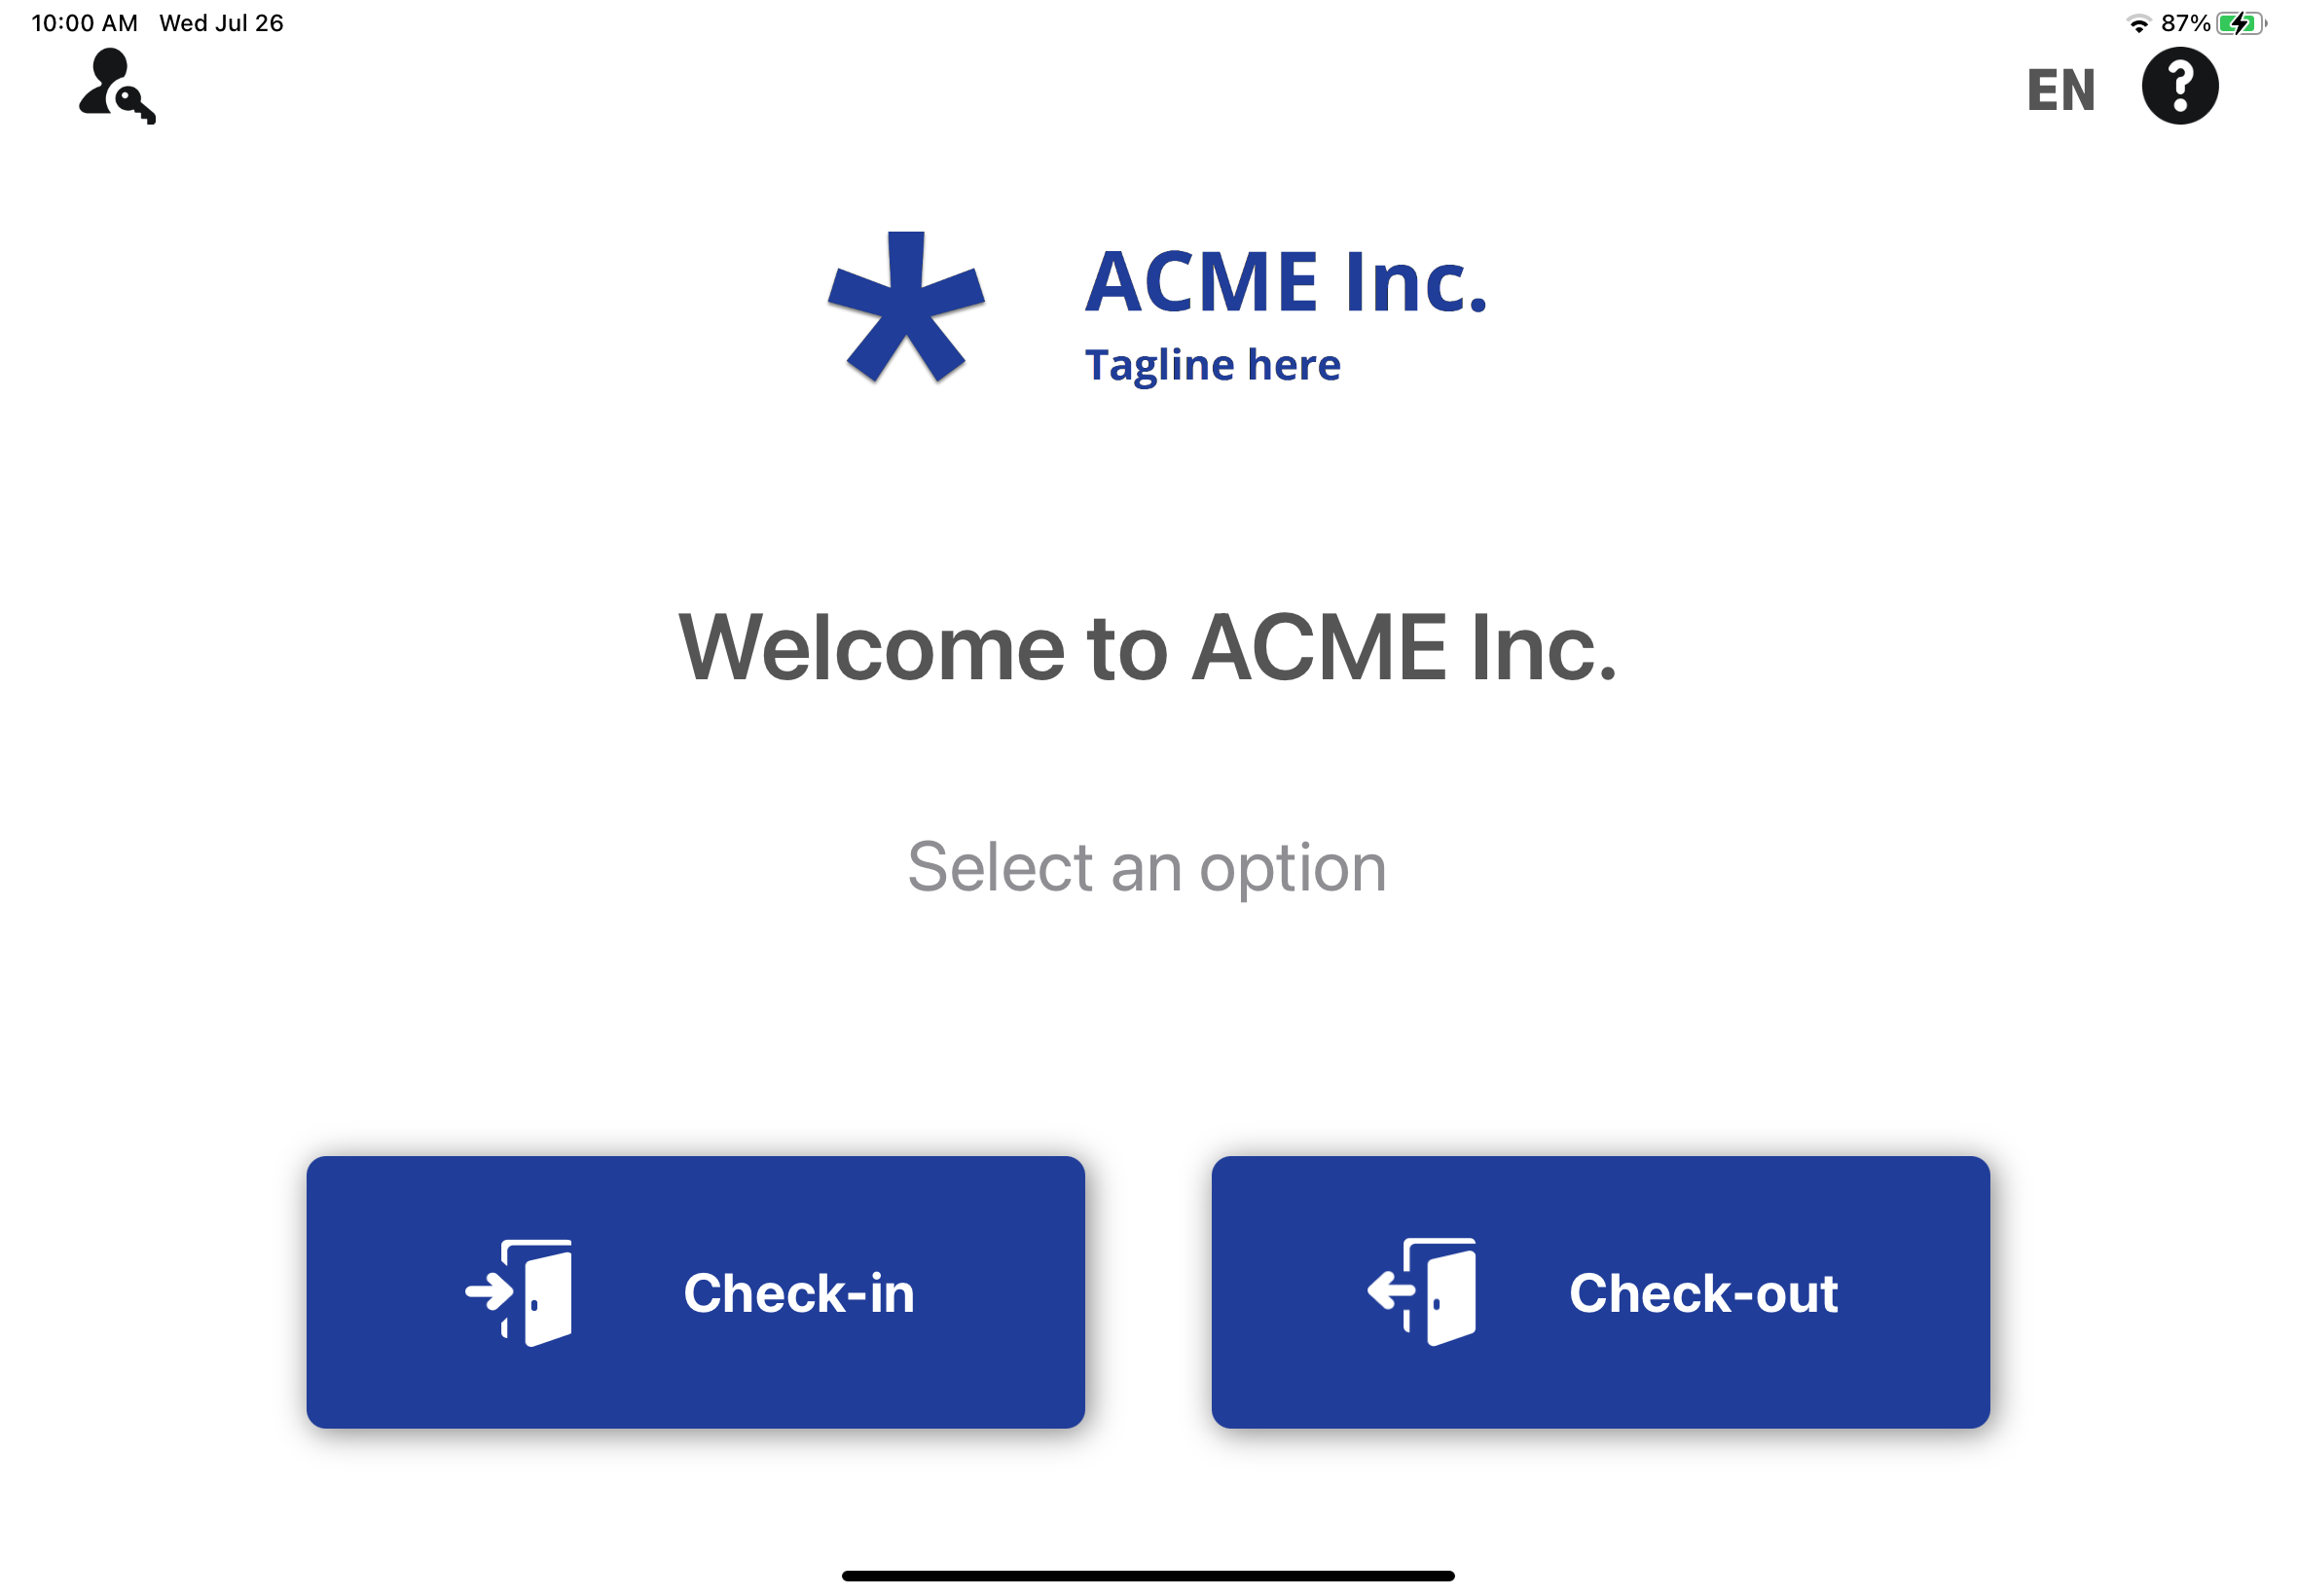 The following example shows the white theme with red accent color to match the red corporate branding seen in the example.