You can modify Genetec ClearID™ custom fields in Genetec™ Configuration desktop so
that they are displayed to specific groups or users. For example, you might display visit
reason, registration code, expected arrival, and expected departure to a group that contains
your security team or building reception team.
What you should know
Only users with the privilege to Modify custom field definitions can view
custom fields.
At least one identity must have been synchronized before any custom fields are
displayed.
Procedure
In Genetec Configuration desktop, Open the System task.
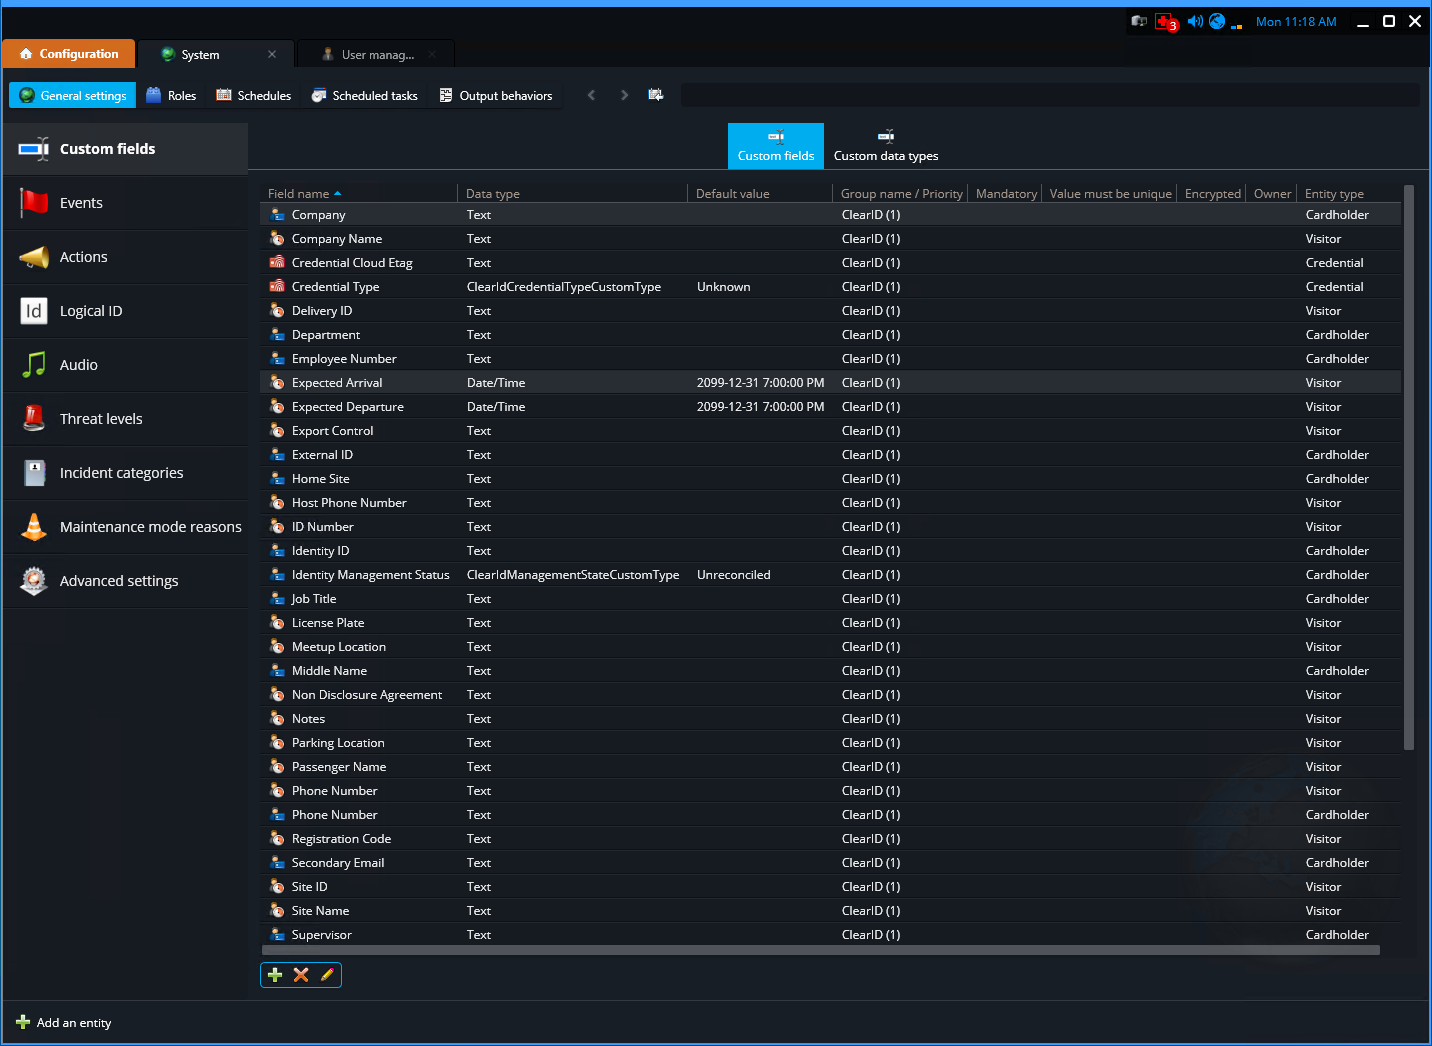
Click Custom fields.
In the Custom fields tab, double-click a Field
name to select the custom field that you want to modify.
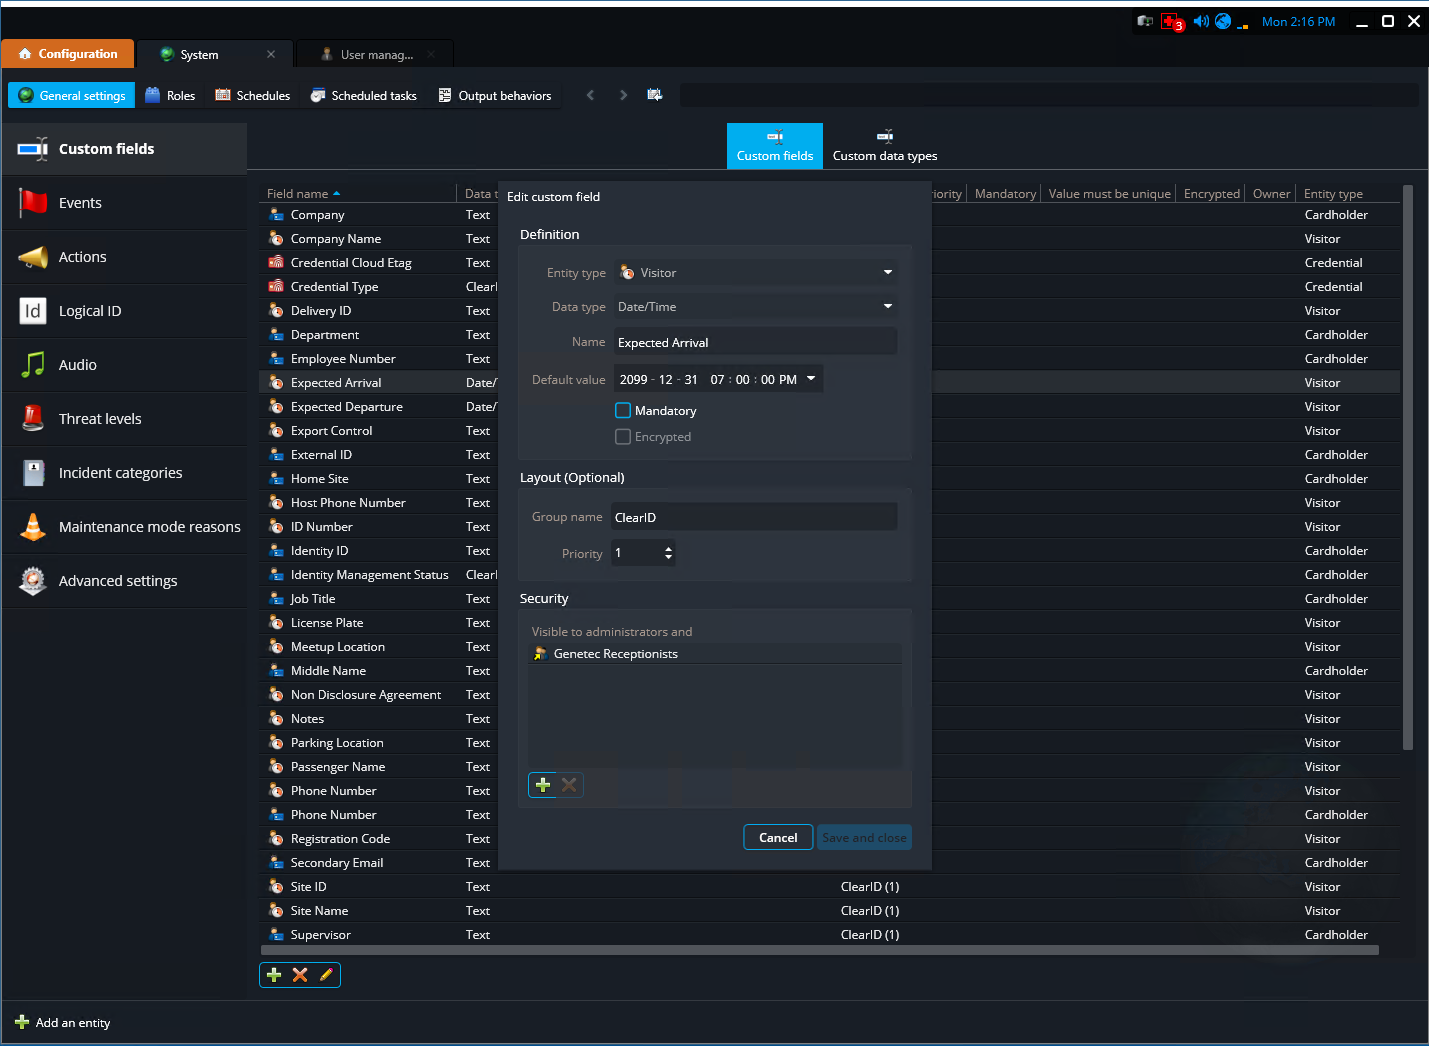
In the Edit custom field dialog, make any changes that you
require.
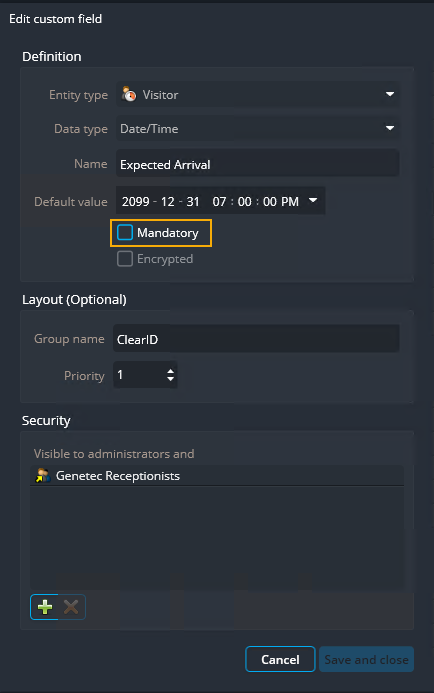
In the Definition section, make any changes that you
require.
Important:
Do not select the Mandatory checkbox for
custom fields. In ClearID, custom fields must not be mandatory or unique
otherwise synchronization issues can occur.
In the Layout section, make any changes that you
require.
For example, you could add a group name to categorize your custom fields.
Alternatively, you could remove a custom field from a group when a grouping is
no longer applicable.
In the Security section, make any changes that you
require.
For example, you might add users or user groups in the
Security section so that the custom field is displayed
to them.
For more information about user
groups or custom fields, see "Creating user groups" or
"About custom fields" in the Security Center Administrator
Guide.
Click Save and close.
Example
The following example shows the Expected arrival custom field. Using the
Security section of the Edit custom field
dialog, the Genetec Receptionists user group has been added so that
the Expected arrival custom field can be displayed to members of the group.