Screening walk-in visitors
2026-07-13Last updated
To screen unplanned visitors to your site, you can use the walk-in visitor check-in option. During check-in, security screening is performed to identify potential matches and to deny access when a security screening match is confirmed.
Before you begin
What you should know
- To activate the security screening option for walk-in visitors, you must configure your visit profile settings at the site level.
- Security screening is only available for accounts in the US and only screens US people.
- Security screening is only supported for walk-in visitors.
Procedure
-
Click Walk-in visitor check-in and follow the on-screen prompts
to complete the required information.
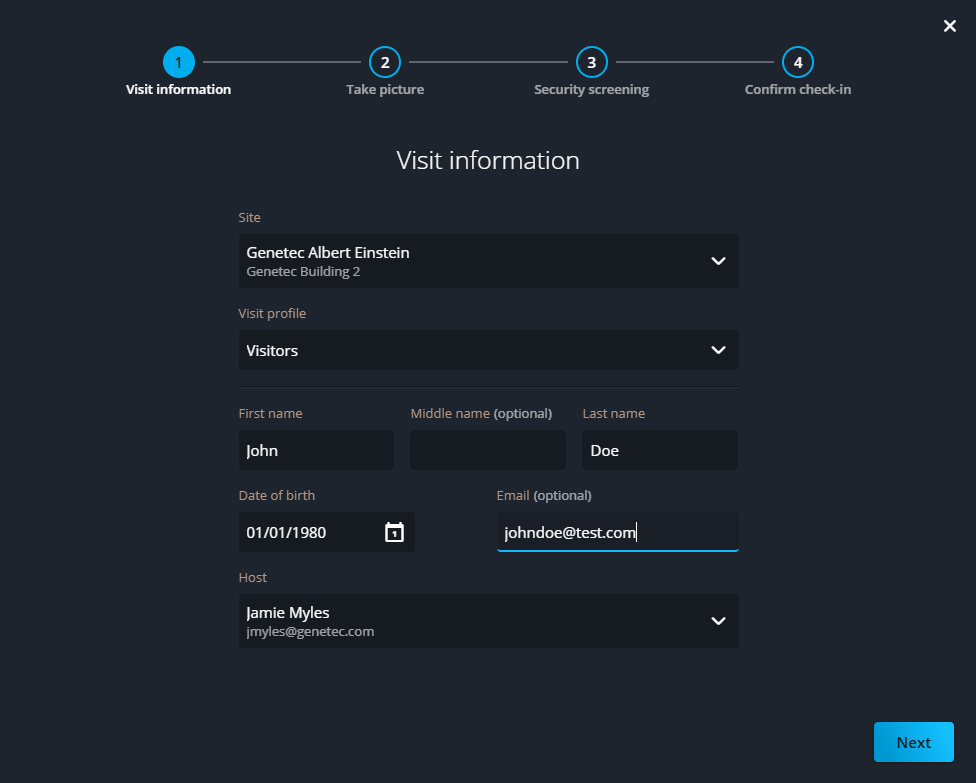 Note:The picture taken during visitor check-in is only stored in our Azure cloud storage and is not sent to third parties.
 -
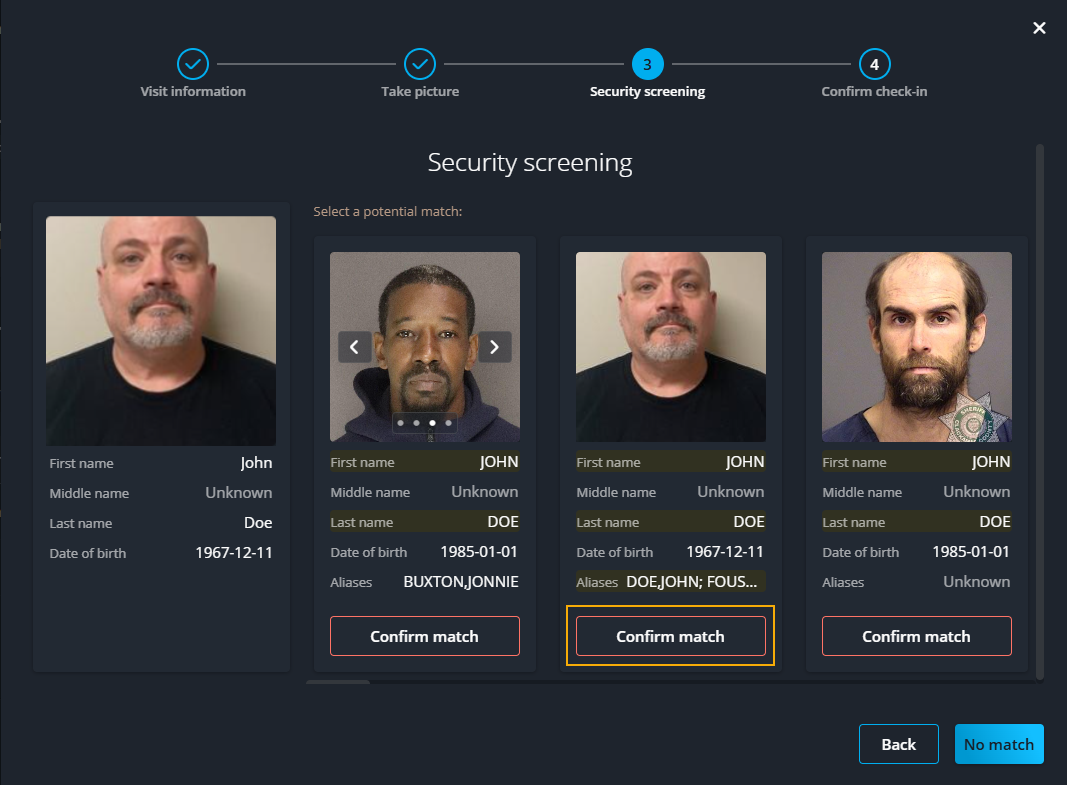
If the person is a possible match, verify the following in the Security
screening section:
- Name and DOB are the same.
- The person in front of you matches a potential match photo.
Note:All matches should have a picture. If not, contact your security team and let them decide how to proceed.-
Click Confirm match.