Georeferencing a map image
2026-03-27Last updated
To ensure all imported maps use the same scale, georeference each map by adding at least three markers with geographic coordinates.
Before you begin
What you should know
Important:
Georeferencing a map removes all existing map objects. After you
georeference the map, you must add the map objects again.
Procedure
-
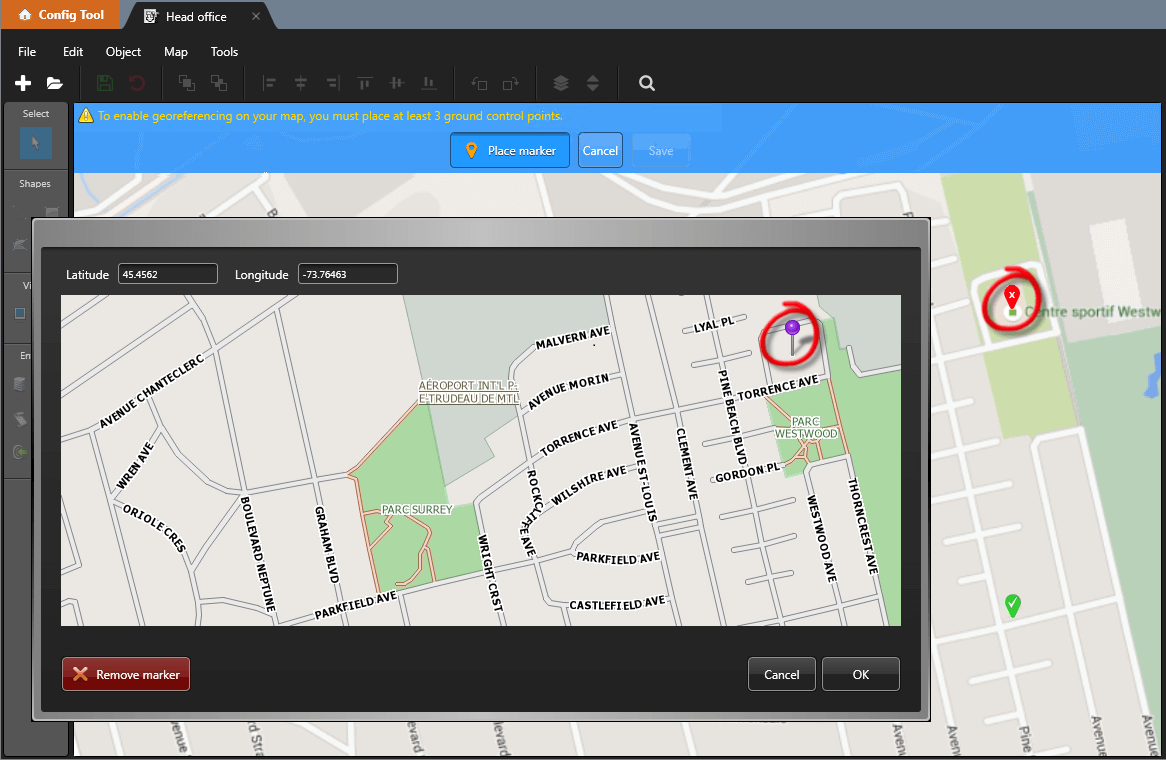
Click a location on the map.
A red marker (
 ) appears at the
selected location, and a window opens displaying a second map.
) appears at the
selected location, and a window opens displaying a second map. -
Zoom in and click the same location on the second map that corresponds to the marker
you placed in the previous step.
Note:If you already know the exact coordinates, you can enter the latitude and longitude in the provided fields.
-
To accept the pin position, click OK.
The window closes, and the red marker () is replaced with a green marker (
 ). If you close the window without selecting a location, the marker
remains red. Click it again to reopen the window.
). If you close the window without selecting a location, the marker
remains red. Click it again to reopen the window. -
In the Map designer toolbar, click
Save (
 ).
).
-
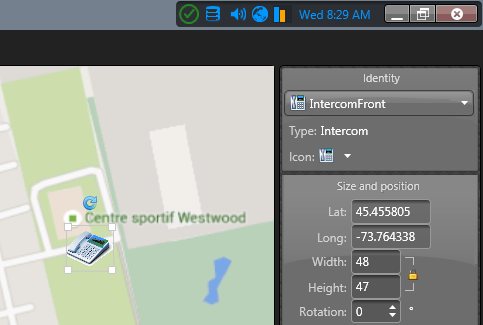
To verify that georeferencing is enabled, add an object to the map.
If the Size and position widget displays the object’s latitude and longitude, the map is georeferenced.