
Adding cameras to your maps
2026-09-29Last updated
Add cameras to a map so operators can monitor live video, camera events, alarms, recordings, and PTZ activity directly from the map.
Before you begin
Procedure
-
In the toolbar, click Area view (
 ), select the camera (
 or
or  ) you want to add, and drag it to the desired location on the map.
The widgets for configuring the map object are displayed in the right panel. The map object always inherits the identity of the entity it represents.
) you want to add, and drag it to the desired location on the map.
The widgets for configuring the map object are displayed in the right panel. The map object always inherits the identity of the entity it represents. -
Select the camera events that you wish to monitor on the map.
- Show motion
- Shows the camera icon with a green ripple effect (
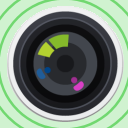 ) on Motion on event.
 - Show recording
- Shows the camera icon with a red button (
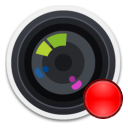 ) when recording is on.
-
In the Map designer toolbar, click
Save (
 ).
).