
Preparing a Bosch intrusion panel to add to Security Center SaaS
2026-06-10Last updated
Configure the settings on your Bosch intrusion panel before adding the panel to Security Center SaaS.
Before you begin
- Read the Bosch documentation that applies to your hardware.
- Review the best practices for connecting intrusion panels to the network. For more information, see Best practices for connecting intrusion panels to the network.
Procedure
-
Enable communication between the panel and Security Center SaaS.
-
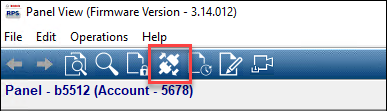
Click the Connect button to connect Bosch RPS to the
panel.
-
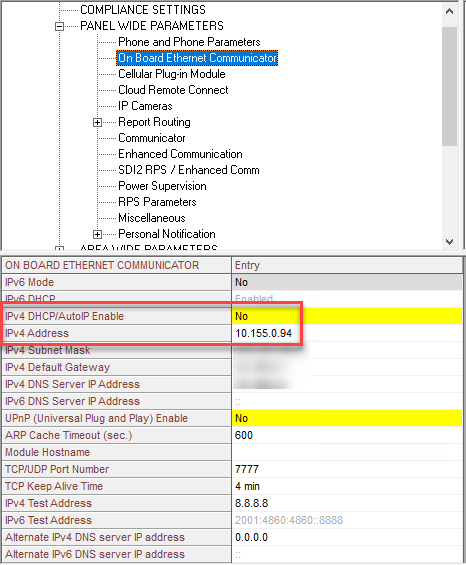
In the settings:
- Set IPv4 DHCP/AutoIP Enable to No.
- Enter an IP address for the panel in the IPv4 Address field.
- Take note of the panel's IPv4 address and TCP/UDP port number. They're required to add the panel to Security Center SaaS.
-
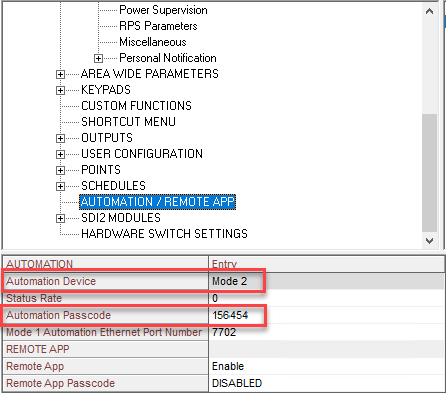
In the Automation/Remote App settings:
- Set Automation Device to Mode 2.
- Set the Automation Passcode.
- Take note of the automation passcode. It's required to add the panel to Security Center SaaS.
-
Click the Connect button to connect Bosch RPS to the
panel.
Example
Watch this video to learn more. Click the Captions icon (CC) to turn on video captions in one of the available languages.