2026-01-14Last updated
Before you can view, record, and upload video to cloud storage, you must add your Bosch
direct-to-cloud (D2C) cameras in Security Center SaaS.
What you should know
Direct-to-cloud requires a corresponding product
subscription.
Procedure
-
Using a web browser, connect to the camera and sign in.
-
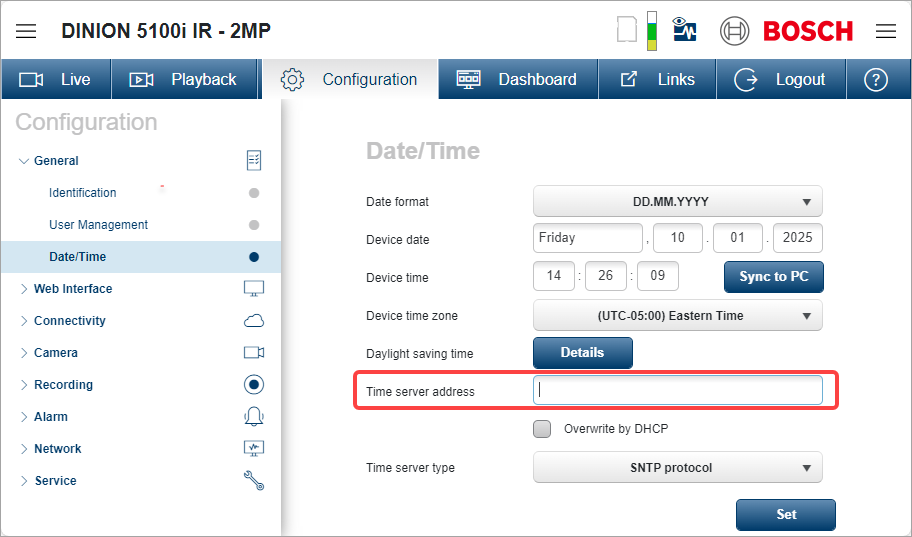
Ensure that the camera is set to the correct time:
-
Click .
-
Select the Device time zone, enter the Time
server address, and click Set.
-
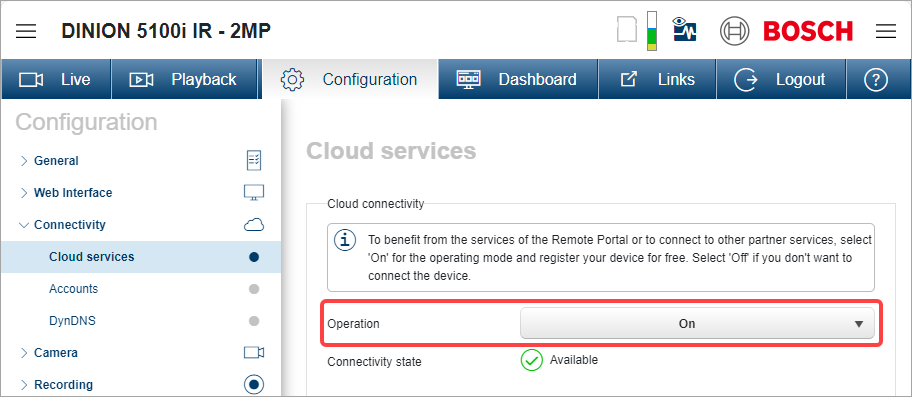
Connect the camera to cloud services:
-
Click .
-
Set Operation to On.
Once successfully activated, the Connection State
displays Available.
-
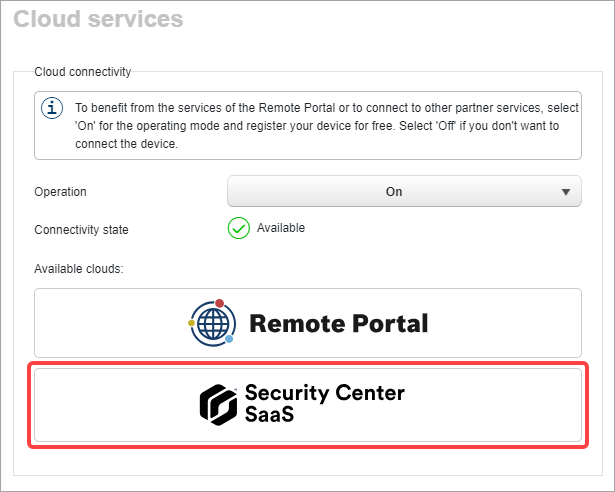
Select Security Center SaaS.
-
Accept the Report Portal terms and conditions and click
Continue.
-
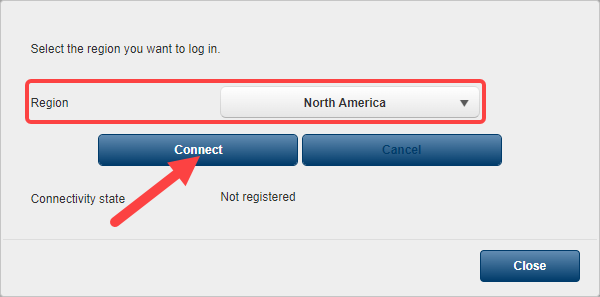
Select a Region and click
Connect.
Once successfully connected, the Connectivity state
displays Registered.
-
Click Close.
Important information is shown under Onboarding Genetec Security
Center SaaS. Take note of the device serial number and device
secret.
-
Under Onboarding Genetec Security Center SaaS, click
Connect.
When the Status shows Waiting for claiming of the
device, the camera is ready to be added to Security Center SaaS.
-
If required, click Open Security Center SaaS and sign in.
-
From the Devices page in the Configuration
task, click Add device.
The configuration wizard opens.
-
On the Type page, click Camera.
-
On the Method page, click Direct-to-cloud
and then click Bosch.
-
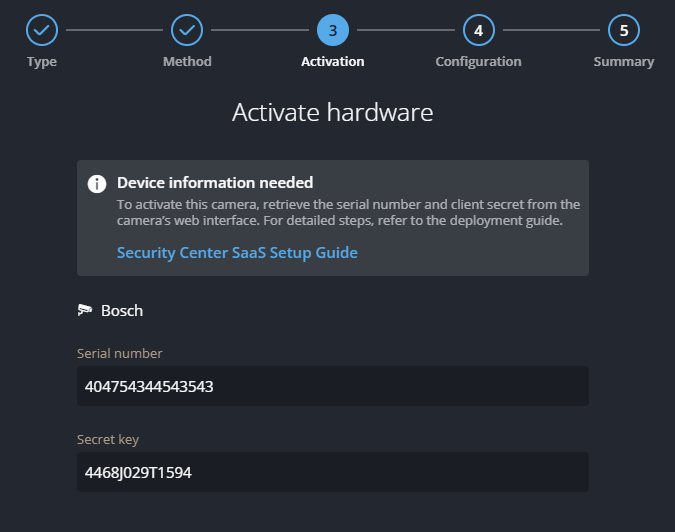
On the Activation page, do one of the following:
- Scan the QR code related to the camera.
- Enter the serial number and secret key of the device.
-
Click Continue.
-
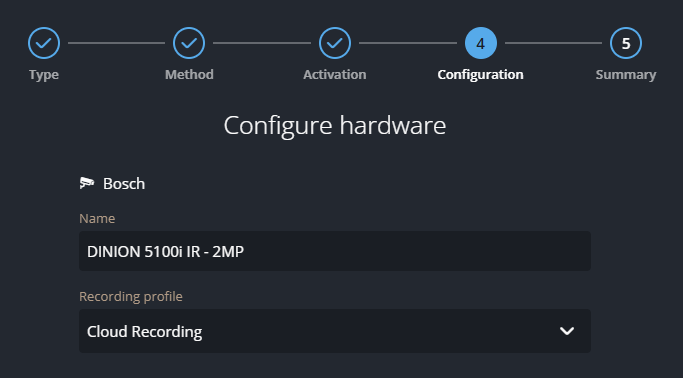
On the Configuration page, enter the required information and then
click Continue.
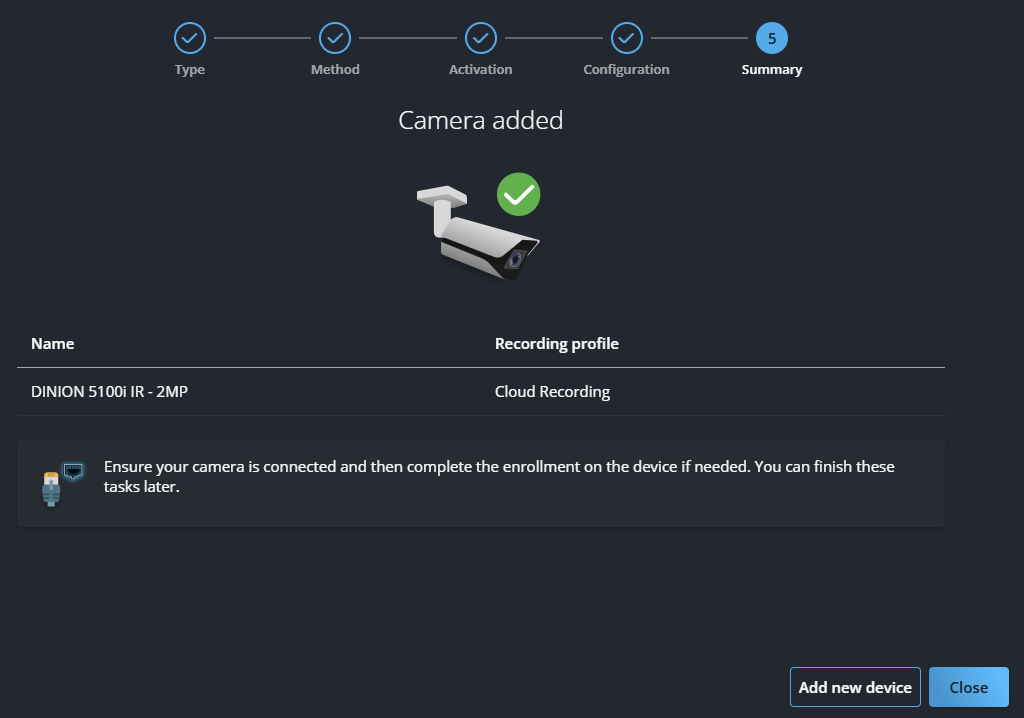
The wizard's Summary page opens, displaying details of the
enrolled camera.
-
Click Close.
The camera is added to the device list and becomes available after a few
seconds.
After you finish
- To configure basic camera settings, select the device and click the
Settings tab in the side pane.
- If you need to change camera settings that aren’t available in the
Configuration task, sign in to the device.

