
Adding i-PRO direct-to-cloud cameras
2026-07-13Last updated
To view, record, and upload video to Cloud Storage from i-PRO direct-to-cloud (D2C) cameras, you must add your cameras in Security Center SaaS.
Before you begin
- Verify that the i-PRO camera is supported. Refer to the Supported Device List.
- Download the "D2C for Genetec™ Security Center SaaS" extension package and the latest
compatible firmware from:
https://i-pro.com/products_and_solutions/en/surveillance/products/d2c-genetec-security-center-saas
- Update the i-PRO camera to the latest compatible firmware.
- Ensure that the camera has internet connectivity and can reach the required endpoint domains.
- If the camera has been activated on another Security Center SaaS system, reset it to factory default settings. Then, uninstall and reinstall the "D2C for Genetec Security Center SaaS" extension package.
Procedure
-
Ensure that the camera is set to the correct time:
-
Under Time & date, select Set PC time to the
camera or configure NTP, and click Set.

-
Under Time & date, select Set PC time to the
camera or configure NTP, and click Set.
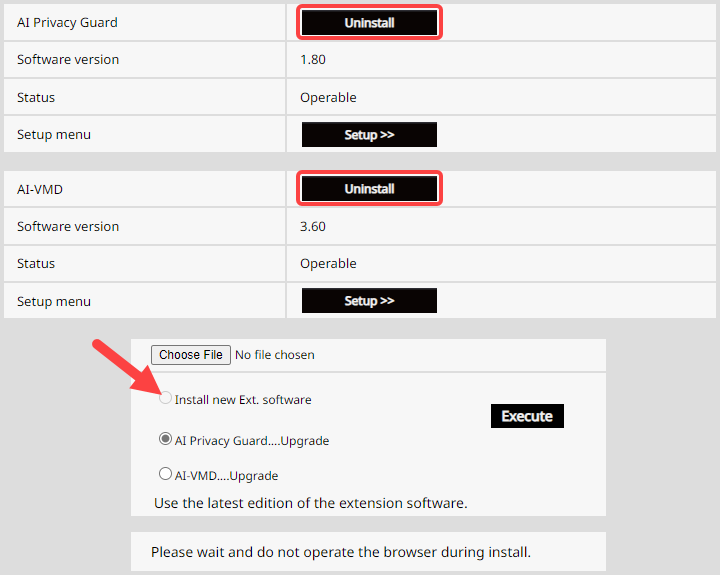
-
On the Software mng. page, click Uninstall
to remove one or more pre-installed extension packages if required.
Note:The camera might prevent you from installing more packages until the existing packages are removed.
After you finish
- If needed, customize your camera's settings.
- To change camera settings that aren’t available in Security Center SaaS, sign in to the device.